How to turn your old smartphone into a security camera

Many people upgrade their smartphone every a few years. What do you do with the smartphone you’re previously using? Isn’t it all the way inside a drawer with others you were using before that? As long as they are operational, you can put them to many uses. There are various usages such as a dedicated music player, alarm clock, remote control for smart home devices. One of more useful ways that you will never know unless you search for it or someone tells you is to convert it into a security camera. The vision captured by old smartphone can be monitored by other devices within the same WiFi network. Or, with streaming setting enabled, you can even watch from anywhere in the world. Here is how to turn your old smartphone into a security camera.
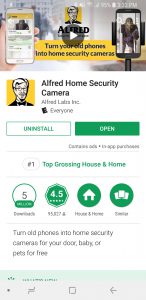
The first thing to do is to install a security-camera app on your old smartphone. There are many apps out there. Alfred is one of the popular security-camera apps. It’s recommended because It’s very easy to use, and most essential features are included in a free version. You may unlock the additional features like zoom and ad-free by upgrading to a premium version for $3.99/mo. If you have multiple old smartphones, you will get more security by setting up multiple cameras.

After you set up your old smartphone as a security camera, now you need a monitor. You can use the other smartphone such as the one you are currently using or a desktop computer as a monitor. For using a smartphone as a monitor, install Alfred app on that device and choose “Viewer” during a setup. For using a desktop computer as a monitor, go to “http://alfred.computer.”

Not only can you monitor in real-time, but you can enable a motion detection feature to record the video and have it stored in the Alfred’s cloud. You will receive a notification on Viewer device instantly upon detection, and you can play the recording by tapping that notification. This feature is included in a free version. The motion detection is useful for a security camera, but you can simply use the app as baby monitor, live chat, pet cam, and so on.
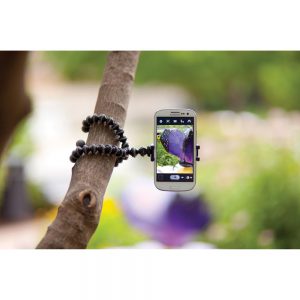
Mounting a smartphone for the camera isn’t difficult because all you need to do is not to block a camera lens and to point it to the place you want to capture. The rest of the parts of the smartphone can be used freely for a tape, string, and so on. You don’t need a fancy mount or tripod, but the type of mount on the picture is very easy to position. Or, a velcro tape is also useful to adjust the position later instead of using plastic cable ties or tapes.

And remember that you need to charge the devices constantly. Without charging the device, it will die in a couple of hours. So you may be going to need an extra long USB cable. From online, you can find a cable with the length of 10-ft, 20-ft, or even 30-ft.
How to do Voice Search without Alexa Voice Remote on Fire TV devices

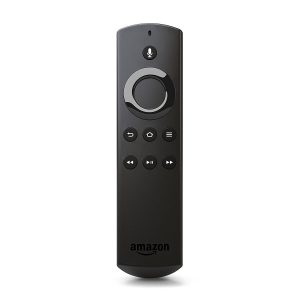
Newer versions of Fire TV devices include a remote with microphone (=Alexa Voice Remote.) A microphone button allows you to speak to Alexa, and she will respond your commands, questions, search streaming contents from Amazon Video. The first generation of Fire TV Stick is the only device which includes a remote without a microphone. The Alexa voice remote is compatible with any Fire TV devices including 1st gen of Fire TV Stick, and you can purchase the remote only. However, this is not the only way to bring Alexa voice assistance to the 1st gen of Fire TV Stick. There are two methods to use Alexa voice assistance without the Voice Remote. These methods also work on all Fire TV devices.

Amazon Fire TV Remote App

The first method is to use an application available in Google Play Store and Apple App Store. The app is free. It’s called Amazon Fire TV Remote. Setup is a breeze. Open the app and select your Fire TV device, and your TV shows a code. Enter the code in the app, and it’s all set. To speak to Alexa, pull down the mic button. Say your command, question, or a voice search while keeping your finger on the screen of the app. You don’t have to say, “Alexa” because pulling down the mic button wakes up Alexa and makes her listen what you’re going to say.

The app has other useful features. Tap the icon next to the mic button, and you will see all apps and games you have installed on your Fire TV device. You can open any app or game with a single tap instead of pressing a directional button multiple times to search and hitting the select button to open.

There is another icon on the top of the app. Tap this icon, and it opens up a keyboard in the app. It’s useful when you search the contents of third-party apps. Because results of Alexa voice search is always on Amazon Video, App, or Game. When you try to find content inside the third-party app, you have to type the keyboard inside the app. The keyboard on third-party app link to the keyboard on Amazon Fire TV Remote app so you can get a search result in that third party app.

Connect Echo device with Fire TV device

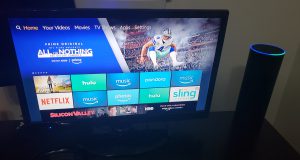
The other method will need an extra device. If you have Amazon Echo or Echo Dot, you can connect to your Fire TV device via Bluetooth. Then, you can make a variety of things on your Fire TV device by speaking to your Echo device.

First, the sound comes from the Echo device. If your TV is small and cheap, you are probably not satisfied with your TV’s sound quality. The Echo or Echo Plus have much better sound quality. Plus, now you have full control of volume with your voice command. You can say, “Alexa, louder,” “Alexa, volume 3,” “Alexa, turn it down.” and so on.

Second, you also have media control such as play, stop, pause, fast forward, etc. Well, it depends on the app, but you can control with your voice at least Pause and Resume on any apps. If you play a video on Amazon Video, you can control a lot of things. You can say, “Alexa, fast-forward 10 minutes.” “Alexa, play from the beginning.”

Third, you can search media with your voice as well. You can say, “Alexa, search [title of the movie].” or “Alexa, find [title of ]the show].” Alexa will respond you by saying “Getting [title] from Fire TV” and show the search result on the TV. As a voice search with the physical remote or the remote app, search results are limited inside Amazon Video, Apps, or Game.

Lastly, you can open an app with your voice. If you say, “Alexa, open Netflix,” and she opens Netflix. If you say, “Alexa, open Hulu,” and she opens Hulu. You can’t open all apps with your voice. I found the following apps can open via Amazon Echo, Amazon Music, Netflix, Hulu, AccuWeather, FireFox, Silk Browser, Crackle, and Vevo. Please note that these are not all. And the most useful command I found is that “Alexa, Home.” This command brings it back to the home screen from any apps.

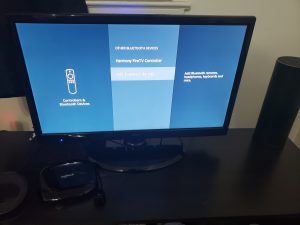
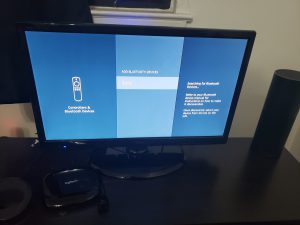
Here is how to connect Echo device with Fire TV device. Go to Settings > Controllers & Bluetooth Devices > Other Bluetooth Devices > Add Bluetooth Devices. Then, you will see “Echo-XXX” on the list. Select and done.

Two devices stay connected until you turn off either of the devices, speak to your Echo devices to disconnect, or go to the settings on Fire TV device. And if you start streaming music, news or weather from third-party apps on your Echo device, it automatically disconnects from the Fire TV device. You can re-connect by saying, “Alexa, connect my device.” Or when you turn back on either of devices, they will automatically connect.

Comparison between two methods

Amazon Fire TV Remote app can do everything the physical remote can do. Plus, you can use a keyboard and shortcuts for apps. And, if your device is the 1st gen of Fire TV Stick, you have Alexa voice assistance as the new feature. The only disadvantage of the Remote app is that it requires a little time to open and connect to the Fire TV device. But, it’s a free app. There is no reason that you don’t want to install the app on your smartphone or tablet.

On the other hand, when you use an Echo device as a remote for a Fire TV, there are many restrictions. However, the benefit of hands-free controls is huge. You should try if you already have both Echo and Fire TV devices. Echo and Echo Plus have relatively good quality speakers. And 2nd gen of Echo and Echo Dot has 3.5 mm auxiliary output to connect and use external speakers.

Related Post

How to turn off Amazon Fire TV Stick

If your Fire TV Stick gets power from your TV, every time you turn off the TV, it cut off the power to the Fire TV Stick at the same time. It seems efficient and reasonable. However, when you turn on the TV next time, the Fire TV Stick will take quite a long time to boot up. What’s more, if you use Bluetooth devices such as Logitech Harmony remote, you have to wait for another minute or so after bootup. It’s frustrating. However, you don’t have to turn off the Fire TV Stick. That’s why there is no power button on the device or the remote in the first place.
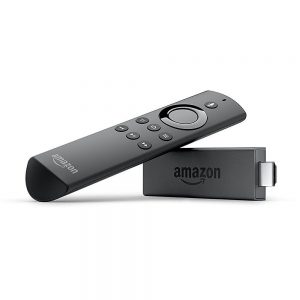
Instead of cutting the power completely, you can put the Fire TV Stick into a sleep mode. Here is the fastest method to put the device into the sleep mode.

  1. Hold down the Home button (from any screen)
  2. Move the cursor to Sleep with a directional button.
  3. Press Select (center) button, and Done

That’s it. You can wake up the device by pressing any button on the remote. Keep in mind that the Fire TV Stick automatically goes into sleep mode after 20 minutes of inactivity. And when updates are available, the device can automatically download and install it when in sleep mode.

I have used and compared three major streaming sticks, Roku, Google Chromecast, and Amazon Fire TV Stick. And I concluded that Amazon Fire TV Stick is the most useful streaming device to me. Of course, that’s not the case for everyone. For those who don’t use Amazon for shopping, reading books, listening to the music, watching videos, or using Alexa voice assistance, the Fire TV Stick seems full of unnecessary apps. But, because of Bluetooth compatibility and Android-based operating system, Fire TV Stick is one of the most versatile streaming devices on the market. You may want to find some other tips and tricks for Amazon Fire TV devices on the following posts.

Related Posts


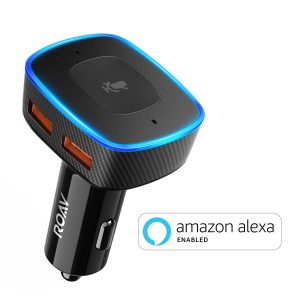
Roav VIVA by Anker, Alexa-Enabled 2-Port USB Car Charger Review

Roav VIVA is an Alexa-enabled two-port USB car charger. It allows you to bring Alexa voice assistance into your car. The VIVA connects to your phone via Bluetooth and uses the phone’s data connection to access the internet. The combination of the VIVA and your phone acts just like an Amazon Echo device. You have almost all Alexa features and skills in your car.

Design

The face of the VIVA consists of the two microphones, a big button, and a LED ring. Keep in mind that pressing the button also wakes up Alexa in addition to saying the wake-word. When you press the button, you don’t have to say, “Alexa.” Just start with your command, question, etc. You can mute and unmute the microphones by long-pressing the button. A noise-canceling chip reduces background noise by 30% to help to isolate your voice from the sound of a car or road.

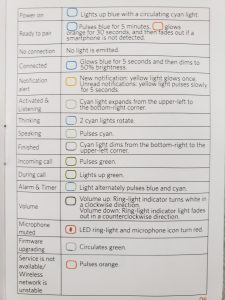
Just like Echo and Echo Dot, the VIVA has a LED ring around the edge of the top, and it shows you a lot of different statuses with different colors and behaviors. You can look up the meaning of the LED colors and behaviors in the image on the right. Keep in mind that you can change the brightness of the LED in the settings of the Roav VIVA app.

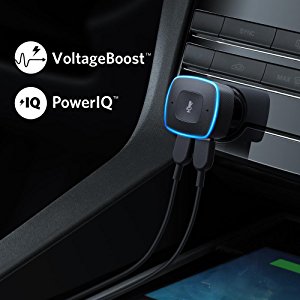
Roav is a subsidiary of Anker, which is popular and famous for their mobile device’s accessories like portable chargers. Two USB ports of the VIVA can charge two mobile devices simultaneously. They both have the Anker’s exclusive fast-charging technologies; PowerIQ and VoltageBoost, and provide up to 2.4 A to charge your device quickly.

Setup

  1. Plug the VIVA into your car’s cigarette lighter socket. Start the car, and the LED ring will turn blue with a circulating cyan light.
  2. Download the Roav VIVA app from Apple App Store or Google Play Store.
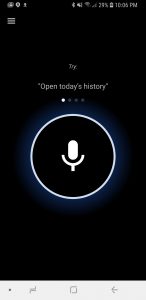
  3. Open the app, select “Roav VIVA_XXXX” to complete a Bluetooth connection to your phone.
  4. Follow the instruction in the app to link with your Amazon Alexa’s account. If you never use any Alexa-enabled devices such as Echo, Fire tablet, or Fire TV, you need to create Amazon Alexa’s account. Install the Amazon Alexa app for iOS or Android and create the account. It’s free, meaning that you don’t have to own other Alexa-enabled devices in your home. It’s totally fine that the VIVA is your first or only Alexa-enabled device.
  5. Lastly, your phone needs to connect with your car’s audio to have sound come out of vehicle’s speakers. There are several methods to get connected. The app has instructions to help you connect via Bluetooth, Aux-in, and USB cable, and you can play the test audio. Most modern cars have any or all of these methods, but older cars may have none of these. If so, you may need an FM transmitter or cassette adapter. Please note the VIVA can work even if you don’t connect your phone to your car’s audio. Without car’s audio, the sound comes out of the phone’s speaker.
  6. Firmware Update – After completing setup, check if a firmware update is available. Firmware update doesn’t start installing automatically. You will need to open the app and start for yourself. An update needs to be done in your vehicle, with the engine on, and your phone connected to the VIVA.

Who is the Roav VIVA for?

The VIVA always needs a smartphone to work with. And the smartphone already has its voice assistance feature such as Google Assistant or Siri. Why would you need an extra gadget for a voice assistance feature? Here is the thing.

If you are heavily invested in the Amazon Alexa’s ecosystem, you probably want Alexa with you everywhere even while driving. If you subscribe to Amazon Music Unlimited, you’d be happy with a complete hands-free control of the music player on demand with tens of millions of songs. If you have some Alexa-enabled devices in your home, you’d prefer the same voice assistance in your car. And thousands of Alexa skills enhances the experience with Alexa-enabled devices, which other voice assistance can’t even compete.

If you prefer Alexa, you might know the Reverb app and install it on your smartphone. The app successfully brings Alexa to your smartphone, but its features are limited. You can’t play music, news, radio, or anything that requires streaming. Besides, it doesn’t offer a hands-free experience. Even if you create a widget or shortcut to access the app quickly, you always need to tap the icon to speak Alexa.
Some people bring Echo Dot in their car. Unlike the original Echo, the Dot is small enough to fit in a center console, and it can get powered via a micro USB cable. Having Echo Dot in a car gives a perfect hands-free experience without any restrictions, but there are two significant disadvantages. First, it takes a few minutes to get ready after you turn on the car while the VIVA takes at most 30 seconds. Second, Echo Dot requires a WiFi connection. In order to get WiFi in your car, you will need a portable WiFi device or use your phone’s hotspot feature. Both have a cap on usage. The VIVA uses your phone data connection so you can take advantage of the unlimited data which many phone’s carriers offer.

Conclusion

The Roav VIVA is not for everyone. If you are happy using Google Assistant or Siri, there is no reason to bring Alexa into your car. But, if you use Alexa in your home, the VIVA will work seamlessly in your vehicle as Echo devices in your home do. It’s worth the price ($50). And remember, the VIVA is also a car charger with two USB outputs equipped Anker’s fast-charging technology. Click here to see the latest price.

Related Post: Roav Viva Pro by Anker review – Alexa-Enabled 2-Port USB Car Charger with FM transmitter

Samsung Galaxy S9 / S9+ Bixby Tips and Tricks

Disable the Bixby key

The S9 and S9+ have a button on the side to open up Bixby Home. It’s called Bixby key. If you are sure that you don’t need it, you can disable the button. But options are either enable or disable; there is no way to assign it to anything else. Press the Bixby button, and Bixby home opens. Tap the setting cog at the top. Find Bixby key and turn it off or tap Bixby key and select Don’t open anything. Please note that even after you disable the key, Bixby continues to respond your voice “Hi, Bixby.” And you can continue to wake Bixby by pressing and holding the Bixby key.

Disable Bixby Voice

If you don’t want to talk to Bixby, you can disable that. Open Bixby Home > Tap 3-dot > Settings > Find “Bixby Voice” > Turn it off. Bixby won’t respond your voice, and long-pressing Bixby key won’t work, either. But short-pressing the key opens Bixby Home unless you didn’t disable the Bixby key by doing things described above.

Disable Bixby Home

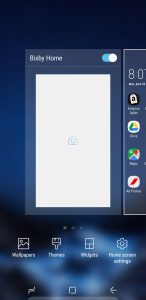
You can open Bixby Home by swiping to the right on the home screen. If you don’t need to access to Bixby Home from the home screen, you can disable. Press and hold an empty space on the home screen > Swipe to the right, and you will see the Bixby Home with the slider > Turn it off by sliding to the left.

How to re-enable Bixby

You have three ways to open Bixby Home, pressing Bixby Key, asking Bixby to open, and swiping the home screen. But, remember, after disabling all methods, the only way to reach Bixby Home is from the home screen. If you want Bixby features back, you need to open or re-enable Bixby Home first, and then you can re-enable others in the settings. To re-enable Bixby Home, press and hold an empty space on the home screen > Swipe to the right and turn back on by moving the slider to the right.

Get Bixby more responsive to you

Can’t you wake up Bixby well? You can change the Bixby’s sensitivity to your “Hi, Bixby.” By default, it’s probably in the lowest setting. Open Bixby Home > Tap 3-dot > Settings > Find “Voice wake-up” and tap > Find “Wake-up sensitivity” > Slide the bar to Low, Medium or High to set the sensitivity.

Improve voice wake-up accuracy

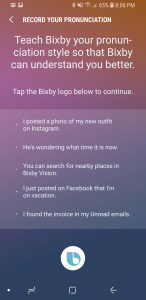
Recording your voice “Hi, Bixby.” You had probably done that when you activated the phone, but you can do more to improve voice wake-up accuracy. You can find “Improve voice wake-up accuracy” just below the bar of “Wake-up sensitivity.” Tap that, it goes to Bixby full screen. Tap the Bixby logo to start the recording.

Enhanced voice recognition

There is another recording to make Bixby understand you better. This recording is not for waking up Bixby better but for improving Bixby’s recognition to your pronunciation. Go to Bixby Home > tap 3-dot > Settings > Find “Enhanced voice recognition” > Tap “Record your pronunciation.” And then, you can start the recordings by tapping the Bixby logo. There are five sentences each page and four pages in total, but you can quit one, two or three pages. The more you do, the better Bixby get accustomed to your pronunciation.

Bixby Vision as a translator

Bixby Vision has various features across different categories. The most popular and well-known feature is Translator. Bixby can translate foreign texts to the texts of your language by using a camera. Open Camera app > Find the icon that looks like an eye and tap, and Bixby Vision will open > Find “T” on the bottom icons (Don’t tap, just place “T” at the center) > Point the camera to text you want to translate, and in no time, Bixby translates and shows you on display with the rest of image intact. There are so many languages to which Bixby can translate.

Extract texts from images

You can use Bixby Vision to extract texts from images both in real-time or from photos. In real-time, instead of just placing “T” icon in the center, tap it, and Bixby extracts texts from the image and you can copy, share, or export only the texts. From photos, Open Gallery and photo > Tap Bixby Vision icon > Bring “T” icon in the center > Shrink or Enlarge a pop-up square and move it over the texts > Tap “T,” and you can copy, share, or export the text. And you probably notice that there is another option to translate. Tap that, and you can see the translation. It’s worth noting that Extract and Translate are not perfect. So, you may need to edit them later. Thus, it’s wise to take and keep original photos until you have decent extracted texts or translations.

Create a shortcut of Bixby Vision

You can create a shortcut of Bixby Vision so you can place it on the home screen or app drawer. Open Camera app > Tap Bixby Vision icon > Tap 3-dot > Settings > Find “Show Bixby Vision shortcut” > Turn it on. Now, you see Bixby Vision shortcut on home screen. Then you can treat it as an app (move, organize in a folder, remove from the home screen, etc.)
Other Bixby Vision features

Bixby Vision can do many other things. When you slide icons on the bottom and place each of them on the center, you can use other Bixby Vision features.

  • Makeup – When you tap this button, the camera automatically switches to the front camera. And then you can put on makeup on your face in the image.
  • Image – Point the camera at something, and Bixby searches for images of similar items from the internet.
  • Shopping – Point the camera at an item to shop online, but search results are not accurate at all. Better not use it for now.
  • Place – Bixby finds places such as stores, bars, restaurants, etc. around where you are. Hold the phone upright and look around, and you will see icons on the screen. Tap the icon to see the details of the places. Bixby can find them within up to 1000 ft radius. You can narrow down a distance and choose categories or ratings.
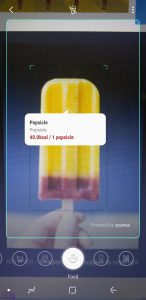
  • Food – Point the camera at the food to know the calories and other nutrition facts.
  • Wine – Point the camera at the label on a wine bottle to know details of it.
  • QR code – You can scan QR codes.

Image, Shopping, Food, and Wine. At the time of writing, these are not reliable because you can’t reach the right products, items, food, or wine most of the time. These features need a lot of improvement.

Use Bixby to dictate instead of typing

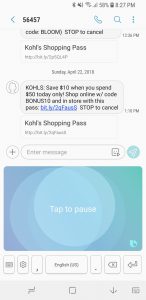
There is no configuration necessary as long as you use the default keyboard (Samsung Keyboard.) Whenever the keyboard is open, you always have an option to use Bixby to dictate instead of typing. Tap the microphone icon on the top row of the keyboard, and you can start dictating whatever you want to write down. This feature works in any apps that use the keyboard. If you want to use Bixby key to start dictating as an extra method, there is a setting for that. Open Bixby Home > Tap 3-dot > Settings > Find “Dictation on keyboard” > Turn it on, and you can start dictating by long-pressing Bixby key whenever the keyboard is open.

Set up Quick Commands

It’s a handy feature. You can create a key phrase or even a single keyword to make Bixby perform a chain of commands. You can also create a chain of commands as you like. Open Bixby Home > Tap 3-dot > Tap My Bixby > Tap Quick Commands > Tap Add to create a new quick command. Don’t forget to hit SAVE after you create a quick command.

Related Posts

Samsung Galaxy S9 / S9+ Display Tips and Tricks

Customize Navigation Bar

You can customize navigation bar as you can do on the S8. You may want Back button on the left rather than right or charge the background color. Go to Settings > Display > Navigation bar, and you can change the layout of the navigation bar here as well as the background color.

Lock the Navigation bar

In an app, the navigation bar is likely to block the sight a little bit on the button. Every time it does, you can make it disappear by tapping the dot on the left end of the navigation bar. But, keep in mind that double-tap the dot make the bar locked at the bottom. It may come in handy for some apps going full screen. To unlock, make another double-tap.

Auto-rotate to landscape mode on home screen and app drawer

It’s a new feature on the S9 and S9+. As apps can rotate from portrait to landscape or vice versa, the S9 and S9+ can do that on the home screen and app drawer, too. It’s off by default. You need to go to Settings > Home Screen Settings, find Portrait mode only, and switch it off. Now, your home screen and app drawer auto-rotates depending how you hold the phone.

Quick access to the full settings page of WiFi, Sound, Power saving, etc.

It’s a tip and trick in common on Android devices. Instead of opening up the settings, tapping and tapping to reach the full and detailed settings page, just press and hold the icon, which appears when you swipe down from the top, and you can jump to the full and detailed settings page. It’s very useful for the settings you need to change often such as WiFi, Sound, Power savings, etc.

Stop Adding the shortcuts of new apps to the home screen

For those who have made the perfect home screen by selecting important apps and adding nice widgets, it’s annoying that it automatically add a shortcut to the home screen every time you install a new app. You can stop the phone from doing that. Go to Settings > Display > Home screen, find “add apps to home screen,” turn it off, and every app you install won’t be added to the home screen anymore.

Multi-window view

You can show and use two apps on display at the same time. Tap the Recent apps button and find the first app you want and tap the icon looking like two boxes at the top of that app card. The first app will stay in the top half of the screen. Next, you will select the second app from Recent apps or App list on the bottom of the screen. The second app will stay in the bottom half of the screen. You can change the sizes of the apps by dragging up or down the blue line between them. Please note that some apps always need a full screen and don’t work with this feature. I found it very handy with a combination of apps like Calendar, Doc, Calculator, Mail, and so on.

One-handed mode

Since the S8 and S8+, Samsung Galaxy smartphones have become a little taller. And, the displays got a lot taller. Consequently, it’s hard to reach the top when you hold the phone with one hand. One-handed mode helps your one-hand operation. The mode makes the screen smaller so you can reach the top with your thumb. You can adjust the size by swiping the corner of the screen. You can also move the screen to the left or the right for a left-handed or right-handed. There are two methods to enter the one-handed mode, Gesture and Button. Gesture means that you need to swipe up diagonally from the bottom left or right. Button means that triple-tap the home button activates the mode. To choose the method, go to Settings > Advanced features > One-handed mode (you can toggle the feature here), and select Gesture or Button. It’s worth noting that the mode continues inside any apps, and you can also enter the mode in any apps. To exit the mode, just tap outside the reduced display area or triple-tap the home button if you choose the Button method. Or, rotating the screen to the landscape mode also exits the one-handed mode.

Related Post

Anker Powerbank Portable Charger Comparison (Highest Capacity 26800 mAh)

The limit of capacity for external batteries you can take on board airplanes is 27027 mAh / 100 Wh. Manufacturers make high capacity powerbank by putting eight 3350 mAh batteries in a single pack (3350*8=26800) to pass the regulation. So, 26800 mAh is considered as the highest capacity for portable chargers. Anker has three distinct powerbanks with this capacity. Here is the post of Anker Powerbank Portable Charger Comparison (Highest Capacity 26800 mAh).

PowerCore 26800

  • Capacity: 26800 mAh / 96.48 Wh
  • Output: 5V=6A (3A max per port)
  • Input: 5V=4A (2A max per port)
  • Dimension: 7″ x 3.2″ x 0.9″
  • Weight: 17.5 oz
  • Number of port: 3
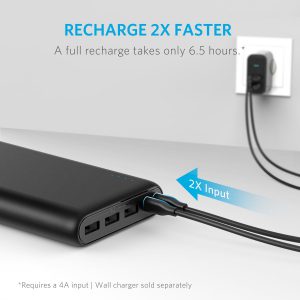
  • Recharging time: 6.5 hours using two 2 A output chargers
  • Features: PowerIQ, VoltageBoost
  • In the box: PowerCore 26800, Two micro USB cables, Travel pouch, Welcome guide
  • Price: $67.99

PowerCore 26800 has three USB output port to charge up to 3 devices at the same time. Each port can provide up to 3 A, but a total output won’t exceed 6 A. It doesn’t have an advanced feature for the input, but PowerCore 26800 has two micro USB input ports so you can recharge twice faster than a single port. The powerbank includes two micro USB cables, but a wall charger doesn’t come with the powerbank. You will need a wall charger with at least two output ports, and each port requires at least 2 A output to recharge in the shortest possible time (6.5 hours.) The 4-dot LED shows the remaining of the battery. Click here to see the latest price.

PowerCore+ 26800

  • Capacity: 26800 mAh / 96.48 Wh
  • Normal Output: 5V=6A (3A max per port)
  • Quick Charge 3.0 Output: 5-6V=3A, 6-9V=2A, 9-12V=1.5A
  • Normal Input: 5V=2A
  • Quick Charge 3.0 Input: 5-7V=2.1A, 7-9V=1.6A, 9-12V=1.25A
  • Dimension: 7″ x 3.1″ x 0.9″
  • Weight: 20.5 oz
  • Number of port: 3 (one Quick Charge 3.0 and two normal)
  • Recharging time: 10 hours using a Quick Charge charger (included)
  • Features: Quick Charge 3.0, PowerIQ, VoltageBoost
  • In the box: PowerCore+ 26800, Quick Charger wall charger, Micro USB cable, Travel pouch, Welcome guide
  • Price: $82.99

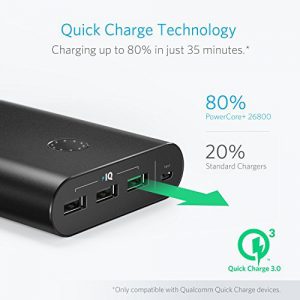
PowerCore+ 26800 has Quick Charge 3.0 technology for both input and output. It has three USB output ports. One is QC 3.0, and the others are standard USB ports. A wall charger is included and compatible with QC 3.0. However, due to its large capacity, it takes quite a while (10 hours) to recharge although it has advanced technology. It’s worth noting that PowerCore 26800 (above) can be recharged much faster than this powerbank, thanks to dual inputs. The 10-dot LED shows the remaining of the battery. Click here to see the latest price.

PowerCore+ 26800 PD

  • Capacity: 26800 mAh / 96.48 Wh
  • Power Delivery Input: 5V=3A, 9V=3A, 15V=2A, 20V=1.5A
  • Normal Output: 5V=3A
  • Power Delivery Output: 5V=3A, 9V=3A, 15V=2A, 20V=1.25A
  • Dimension: 7.1″ x 3.1″ x 0.9″
  • Weight: 20.5 oz
  • Number of port: 3 (one USB-C and two USB)
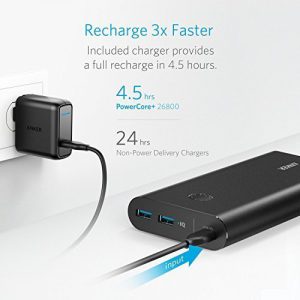
  • Recharging time: 4.5 hours using 30W USB-C wall charger (included)
  • Features: Power Delivery, PowerIQ, VoltageBoost
  • In the box: PowerCore+ 26800 PD, 30W USB-C wall charger, USB-C to USB-C cable, Micro USB cable, Travel pouch, Welcome guide
  • Price: $99.99

PowerCore+ 26800 PD has a USB-C port with Power Delivery support. The USB-C port is used as both input and output. With the included wall charger, you can recharge the powerbank in just 4.5 hours. A USB-C to USB-C cable and micro USB cable are also included. For output, the USB-C port can charge USB-C laptops, Nintendo switch, iPhone X, and so on. The 10-dot LED shows the remaining of the battery. Click here to see the latest price.

Conclusion

Just like other 20000 or 20100 mAh, the recharging time is a crucial factor when you choose high capacity powerbanks. For 26800 mAh capacity, Quick Charger charger may not be enough to recharge in a short time. In fact, PowerCore+ 26800 needs 10 hours to recharge with an included QC charger. Anker made a unique approach to make a recharging time shorter on PowerCore 26800. Instead of using an advanced fast-charging technology, Anker added one more input port so you can recharge the powerbank twice faster than a single input. The recharging time of 6.5 hours is pretty impressive. But, a wall charger is not included. You will need a suitable wall charger for that. PowerCore+ 26800 PD offers the shortest recharging time by using USB-C Power Delivery. The recharging time of 4.5 hours beats all competitors. Even if you don’t own electric devices with USB-C PD support, you may be going to have ones in the future. It has two standard USB output ports for charging your devices without USB-C. And it includes all accessories like a wall charger and cables. PowerCore+ 26800 PD is the most powerful and advanced portable charger in this capacity.

Related post

Anker Powerbank Portable Charger Comparison (High Capacity 20000 and 20100 mAh)

Anker is a leading brand for powerbanks, chargers, and accessories. Portable chargers with a capacity of more than 20000 mAh can charge a smartphone or tablet many times. Despite high capacity, Anker’s portable chargers are more compact and lighter than competitors. However, Anker has many models in this range (20000 and 20100 mAh), and of course, they are different from each other. It’s important to know the differences so that you can choose the right one for you. Here is the post of Anker Powerbank Portable Charger Comparison (High Capacity 20000 and 20100 mAh).

PowerCore Speed 20000

  • Capacity: 20100 mAh / 72.36 Wh
  • Normal Output: 5V=2A
  • Quick Charge 3.0 Output: 5-8V=3A, 8-10V=2.4A, 10-12V=2A
  • Quick Charge 3.0 Input: 5-7V=2A, 7-9V=2A, 9-12V=1.5A
  • Dimension: 6.5″ x 2.4″ x 0.9″
  • Weight: 13 oz
  • Number of port: 2 (Quick Charge 3.0 and normal)
  • Recharging time: 5.5 hours using a Quick Charge charger
  • Features: Quick Charge 3.0, PowerIQ, VoltageBoost
  • In the box: PowerCore Speed 20000, Micro USB cable, Travel pouch, Welcome guide
  • Price: $55.99

PowerCore Speed 20000 uses Quick Charge 3.0 technology on both output and input. It has two output port, and one of them is compatible with Quick Charge 3.0 providing up to 18 W of power to charge your device quickly. For the input, you can recharge it in 5.5 hours when you use a Quick Charge charger. It’s very impressive speed for recharging a powerbank with such a high capacity. But, unfortunately, a Quick Charge charger is not included. The 4-dot LED shows the remaining of the battery. Click here to see the latest price.

PowerCore Elite 20000

  • Capacity: 20000 mAh / 77 Wh
  • Output: 5V=6A (3A max per port)
  • Input: 5V=4A (2A max per port)
  • Dimension: 6.3″ x 2.6″ x 1″
  • Weight: 13.5 oz
  • Number of port: 3
  • Recharging time: 6 hours using two 2 A output charger
  • Features: PowerIQ, VoltageBoost
  • In the box: PowerCore Elite 20000, Two micro USB cables, Travel pouch, Welcome guide
  • Price: $43.99

PowerCore Elite 20000 has three output USB port so that you can charge three devices at the same time. Each port can provide up to 15 W (5V*3A). But when you charge multiple devices, a total output won’t exceed 30 W (5V*6A). The Elite has two micro USB ports for recharging. Thanks to dual input ports, you can recharge the Elite in only 6 hours when you use two 2 A output charger. Please note that a wall charger is not included. You will need two 2 A output wall chargers or a wall charger with two USB outputs providing at least 2 A per port. Two micro USB cables are included. The 4-dot LED shows the remaining of the battery. Click here to see the latest price.

PowerCore 20100

  • Capacity: 20100 mAh / 72.36 Wh
  • Output: 5V=4.8A (2.4A max per port)
  • Input: 5V=2A
  • Dimension: 6.5″ x 2.3″ x 0.9″
  • Weight: 12.6 oz
  • Number of port: 2
  • Recharging time: 11 to 12 hours using a 2 A output charger
  • Features: PowerIQ, VoltageBoost
  • In the box: PowerCore 20100, Micro USB cable, Travel pouch, Welcome guide
  • Price: $43.99

PowerCore 20100 is the basic powerbank. It has the fast-charging technology of PowerIQ and VoltageBoost. And it provides up to 12 W from each port, which is sufficient for charging a smartphone or tablet. However, it may not be sufficient for the input. Since it has a high capacity, it takes a long time (11 to 12 hours) to recharge. If you think it’s too long, you may want to consider powerbanks with a premium technology such as PowerIQ 2.0, Quick Charge 3.0, or Power Delivery. PowerCore 20100 has 4-dot LED showing the remaining of the battery. Click here to see the latest price.

PowerCore+ 20100 USB-C

  • Capacity: 20100 mAh / 72.36 Wh
  • Output: 5V=6A (3A max for USB-C, 2.4A max for USB)
  • Input: 5V=2.4A
  • Dimension: 7.2″ x 2.4″ x 0.9″
  • Weight: 16 oz
  • Number of port: 3 (one USB-C and two USB)
  • Features: PowerIQ, VotageBoost
  • In the box: PowerCore+ 20100 USB-C, Micro USB cable, USB to USB-C cable, USB-C to USB-C cable, Travel pouch, Welcome guide
  • Price: $65.99

PowerCore+ 20100 USB-C has an USB-C port. The port is used as both input and output. For output, it can provide up to 3 A. And, the other two USB ports can provide up to 2.4 A. But when you use multiple ports, a total output won’t exceed 6 A. A power of 15 W from USB-C, and 12 W from USB are enough to charge a smartphone and tablet quickly. For input, however, the USB-C port takes 12 W (5V*2.4A), and it may not be powerful enough for powerbanks with a high capacity because it takes 10 to 11 hours to recharge using a 2.4 A output charger. If you think it’s too long, you may want to consider powerbanks with a premium technology such as PowerIQ 2.0, Quick Charge 3.0, or Power Delivery. PowerCore+ 20100 USB-C has 10-dot LED showing the remaining of the battery. Click here to the latest price.

PowerCore II 20000

  • Capacity: 20000 mAh / 72.36 Wh
  • Normal Output: 5V=2.4A
  • PowerIQ 2.0 Output: 5V=3A, 9V=2A, 12V=1.5A
  • PowerIQ 2.0 Input: 5V=2A, 9V=2A
  • Dimension: 6.7″ x 2.4″ x 0.9″
  • Weight: 13 oz
  • Number of port: 2 (PowerIQ 2.0 and normal)
  • Recharging time: 5 hours using a Quick Charge charger
  • Features: PowerIQ 2.0
  • In the box: PowerCore II 20000, Micro USB cable, Travel pouch, Welcome guide
  • Price: $49.99

PowerCore II 20000 uses Anker’s latest fast-charging technology, PowerIQ 2.0. Thanks to this technology, it provides up to 18 W of power and receives up to 18 W for recharging as well. You can recharge in as fast as 5 hours with a Quick Charge charger, but a wall charger isn’t included. It has two USB output ports. One is for PowerIQ 2.0 and capable of providing up to 18 W. And the other is for PowerIQ and capable of providing up to 12 W. The 8-dot LED shows the remaining of the battery. Click here to see the latest price.

PowerCore Speed 20000 PD

  • Capacity: 20100 mAh / 72.36 Wh
  • Power Delivery Output: 5V=3A, 9V=2.6A, 15V=1.6V, 20V=1.1A
  • Normal Output: 5V=2A
  • Power Delivery Input: 5V=3!, 9V=3A, 15V=2A, 20V=1.5A
  • Dimension: 6.6″ x 2.4″ x 0.9″
  • Weight: 12.7 oz
  • Number of port: 2 (USB-C and normal)
  • Recharging time: 4 hours using a 30W Power Delivery wall charger (included)
  • Features: Power Delivery
  • In the box: PowerCore Speed 20000 PD, 30 W Power Delivery wall charger, USB-C to USB-C cable, Micro USB cable, Travel charger, Welcome guide
  • Price: $79.99

PowerCore Speed 20000 PD is compatible with USB-C Power Delivery. The USB-C port is used as both input and output. For input, you can recharge it in just 4 hours with an included 30 W wall charger. For output, it can provide up to 22.5 W of power for USB-C Power Delivery compatible devices such as Nintendo Switch and Macbook. There is another output. It’s a standard USB port. The 4-dot LED show the remaining of the battery. All accessories are included. Click here to see the latest price.

Conclusion

When you choose a high capacity powerbank, one of the most important factors is the recharging time. Some models need almost a half day, but most other models need just 4 to 6 hours, which is very impressive. And they use different technologies for that.

If you have USB-C Power Delivery compatible devices, PowerCore Speed 20000 PD is the best choice. A wall charger and cables are all included. Although you don’t have USB-C PD compatible devices now, you probably will in the future. If you have Qualcomm Quick Charge 3.0 compatible devices, PowerCore Speed 20000 or PowerCore II 20000 may be the right ones. But remember you will need a Quick Charge wall charger, and it doesn’t come with these models. Even for those who don’t own such devices, short recharging time of these models is beneficial. And PowerCore Elite 20000 is another choice for those who don’t have such devices, but you will need a wall charger as well.

Related post

Anker Powerbank Portable Charger Comparison (Mid-size 13000 to 15600 mAh)

Anker is a leading brand for powerbanks and other charging accessories for electric devices. When you need to charge two devices at the same time, you will need a portable charger with multiple USB output ports. In general, the higher capacity, the more ports a portable charger has. For Anker’s portable chargers, you will need ones with at least 13000 mAh capacity to charge multiple devices simultaneously. All portable chargers in this port (13000 and 15600 mAh) have two USB output ports. Anker has released several chargers in this range. Let’s see the differences.

PowerCore 13000

  • Capacity: 13000 mAh / 46.8 Wh
  • Output: 5V=3A
  • Input: 5V=2A
  • Dimension: 3.8″ x 3.1″ x 0.9″
  • Weight: 8.5 oz
  • Recharging time: 7 to 8 hours using a 2 A output charger
  • Features: PowerIQ, VoltageBoost
  • In the box: PowerCore 13000, Micro USB cable, Travel pouch, Welcome guide
  • Price: $31.99

PowerCore 13000 is a basic portable charger. With PowerIQ technology, it identifies any connected device and adjusts output power for optimizing charging speed. According to Anker, it can provide up to 3 A from each port. The 4-dot LED show the remaining of the battery. Click here to see the latest price.

PowerCore 15600

  • Capacity: 15600 mAh / 57.72 Wh
  • Output: 5V=2.4A
  • Input: 5V=2A
  • Dimension: 6.5″ x 2.3″ x 0.9″
  • Weight: 12 oz
  • Recharging time: 9 to 10 hours using a 2 A output charger
  • Features: PowerIQ, VoltageBoost
  • In the box: PowerCore 15600, Micro USB cable, Travel pouch, Welcome guide
  • Price: $35.99

PowerCore 15600 is another basic portable charger. It has a little higher capacity than PowerCore 13000, but it provides a little less output power according to specifications in Anker’s website. (I don’t know how come there is a difference although both PowerCore 13000 and 15600 have the same technology.) Without any other feature like Quick Charge, the higher capacity, the more time it needs for recharging. It takes 9 to 10 hours with a 2 A output charger, and there is no way to make it faster than that even if you use a Quick Charge charger. The 4-dot LED shows the remaining of the battery. Click here to see the latest price.

PowerCore+ 13400

  • Capacity: 13400 mAh / 46.8 Wh
  • Normal Output: 5V=1.5A
  • Quick Charge Output: 5-6V=3A, 6-9V=2A, 9-12V=1.5A
  • Input: 5V=2A
  • Dimension: 3.9″ x 3.1″ x 0.9″
  • Weight: 11 oz
  • Recharging time: 8 hours using a 2 A output charger
  • Features: Quick Charge 3.0, PowerIQ, VoltageBoost
  • In the box: PowerCore+ 13400, Micro USB cable, Travel pouch, Welcome guide
  • Price: $39.99

PowerCore+ 13400 has Quick Charge 3.0. One of the output port can provide up to 18 W. However, the normal output port can provide only 7.5 W max. Besides, Quick Charge 3.0 technology is used for output only. The input for recharging has no special features. It takes around 8 hours to recharge with a 2 A output charger. Even if you use Quick Charge charger, recharging won’t get faster. The 10-dot LED shows the remaining of the battery. Click here to see the latest price.

PowerCore 13000 C

  • Capacity: 13000 mAh / 46.8 Wh
  • Output: 5V=3A
  • Input: 5V=2A
  • Dimension: 3.8″ x 3.1″ x 0.9″
  • Weight: 8.5 oz
  • Recharging time: 8 hours using a 2 A output charger
  • Features: PowerIQ, VoltageBoost
  • In the box: PowerCore 13000 C, Micro USB cable, USB to C cable, Travel pouch, Welcome guide
  • Price: $29.99

PowerCore 13000 C has the same specs as PowerCore 13000. The difference is that it has USB-C input port instead of Micro USB. Don’t expect something new and better on this charger just because it has the port which is used for newer smartphones or tablets. Again, the charger has the same specs as PowerCore 13000. It doesn’t have remarkable features. For a consolation, a USB-to-C cable is included. The 4-dot LED shows the remaining of the battery. Click here to the latest price.

Conclusion

The portable chargers here in this post are disappointing. There are no notable features on any of them. Only PowerCore+ 13400 has Quick Charge 3.0 technology, but that’s only for output. PowerCore 13000 C uses merely USB-C as an input port. That’s all. There is no benefit or special feature come from it. I don’t recommend any of these models. If you need a portable charger with multiple ports, It’s better to choose a charger with 20000 mAh or higher.

Related post

Anker Powerbank Portable Charger Comparison (Compact size 10000 and 10050 mAh)

Anker is a leading brand for powerbanks or portable battery chargers. You may already know the capacity of portable charger you need for charging your mobile devices. But, you may be surprised that there are so many models Anker has released. For example, All models in this post have the capacity of either 10000 or 10050 mAh. What are the differences? Here is the post of Anker Compact size (10000 and 10050 mAh) portable charger comparison.

PowerCore II Slim 10000

  • Capacity: 10000 mAh / 38.5 Wh
  • Output: 5-6V=3A, 6-9 V=2A, 9-12V=1.5A
  • Input: 5V=2A, 9V=2A
  • Dimension: 5.4″ x 2.6″ x 0.6″
  • Weight: 7.4 oz
  • Recharging time: 4 hrs w/Quick Charge, 5 hrs 40 mins w/2A, 10 hrs w/1A output charger
  • Features: PowerIQ 2.0
  • In the box: PowerCore II Slim 10000, Micro USB cable, Travel pouch, Welcome guide
  • Price: $27.99

PowerCore II Slim 10000 has PowerIQ 2.0. PowerIQ 2.0 is an upgraded version of PowerIQ, Anker’s exclusive fast-charging technology. PowerIQ 2.0 can provide up to 18 W of power while PowerIQ outputs up to 12 W. Not only does the Slim output high power, but you can also recharge the Slim in as little as 4 hours when you use a Quick Charge charger (not included). It has 4-dot LED to show the remaining of the battery. Slim design fits most smartphones so you can stack them together, and a silicone surface protects from scratches and knocks. Click here to see the latest price.

PowerCore 10000

  • Capacity: 10000 mAh / 36 Wh
  • Output: 5V=2.4A
  • Input: 5V=2A
  • Dimension: 3.6″ x 2.4″ x 0.9″
  • Weight: 6.3 oz
  • Recharging time: 6 to 7 hours using a 2 A output charger
  • Features: PowerIQ, Voltageboost
  • In the box: PowerCore 10000, Micro USB cable, Travel pouch, Welcome guide
  • Price: $26.99

PowerCore 10000 is the very basic version among Anker’s 10000-mAh portable chargers. However, it outputs up to 2.4 A which is enough to charge modern smartphones quickly. The drawback is that it takes more hours to recharge itself (6-7 hours with a 2A output charger) than other models. The 4-dot LED shows the remaining of the battery. If you are looking for a 10000 mAh portable charger, and the prices are not much different from other models, you may want to consider other models. For example, PowerCore II or PowerCore+. Click here to see the latest price.

PowerCore Speed 10000

  • Capacity: 10000 mAh / 36 Wh
  • Output: 5-8V=3A, 8-10V=2.4A, 10-12V=2A
  • Input: 5V=2A
  • Dimension: 3.9″ x 2.5″ x 0.9″
  • Weight: 7 oz
  • Recharging time: 6 to 7 hours using a 2 A output charger
  • Features: PowerIQ, VoltageBoost, Quick Charge 3.0
  • In the box: PowerCore Speed 10000, Micro USB cable, Travel Pouch, Welcome guide
  • Price: $35.99

PowerCore Speed is equipped Quick Charge 3.0, fast charging technology by Qualcomm. It promises that it can charge up to four times faster than conventional charging and 80% on compatible devices in only half an hour. Quick Charge 3.0 is compatible with devices with some of newer Qualcomm Snapdragon processors. Even if your device is not compatible with Quick Charge 3.0, PowerCore Speed has other fast-charging technologies (PowerIQ and VoltageBoost) to make the device charged at the fastest possible speed. It has 4-dot LED to show the remaining of the battery. Unfortunately, its recharging time is not impressive. It takes 6 to 7 hours, which is the same as the basic one above (PowerCore 10000). If you want to cut more recharging time, you may want to consider PowerCore II, PowerCore II Slim, or PowerCore+. Click here to see the latest price.

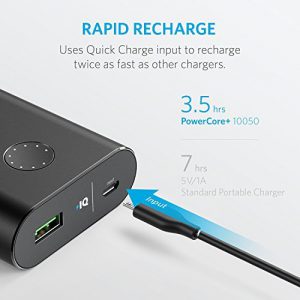
PowerCore+ 10050

  • Capacity: 10050 mAh / 36.18 Wh
  • Output: 5-6V=3A, 6-9V=2A, 9-12V=1.5A
  • Input: 5-7V=2.1A, 7-9V=1.6A, 9-12V=1.25A
  • Dimension: 3.8″ x 2.4″ x 0.9″
  • Weight: 8.5 oz
  • Recharging time: 3.5 hours using a Quick Charge charger
  • Features: Quick Charge 3.0, PowerIQ, VoltageBoost
  • In the box: PowerCore+ 10050, Micro USB cable, Travel pouch, Welcome guide
  • Price: $34.99

PowerCore+ has three distinct fast charging technology, Quick Charge 3.0, PowerIQ, and VoltageBoost. PowerCore Speed (above) has the same technology, but PowerCore+ has a couple of better features than PowerCore Speed. First, unlike PowerCore Speed, the Quick Charge technology is used for not only output but also input. As a result, the recharging time is much shorter than the Speed. The design is also upgraded. PowerCore+ has an 8-dot LED to show the remaining of the battery which is more detailed than a 4-dot LED. Anker recommends Anker Quick Charger 3.0 charger (wall adapter) to give it the fastest and safest recharge. Unfortunately, it is not included. Click here to see the latest price.

PowerCore II 10000

  • Capacity: 10050 mAh / 36.18 Wh
  • Output: 5V=3A, 9V=2A, 12V=1.5A
  • Input: 5V=2A, 9V=2A
  • Dimension: 3.8″ x 2.4″ x 0.9″
  • Weight: 6.3 oz
  • Recharging time: 4 hours using a Quick Charge charger
  • Features: PowerIQ 2.0, VoltageBoost
  • In the box: PowerCore II 10000, Micro USB cable, Travel pouch, Welcome guide
  • Price: $29.99

PowerCore II 10000 has PowerIQ 2.0, which is Anker’s exclusive technology and capable of handling up to 18 W of power for both input and output. And 18 W is equivalent to Quick Charge 3.0 technology. Thanks to PowerIQ 2.0, you can charge most mobile devices at the fastest possible speed. And, you can also quickly recharge PowerCore II with a Quick Charge charger (not included). If you use a 2 A output charger, it takes 5 hours to recharge, which is still short and impressive. The 8-dot LED shows the remaining of the battery. Click here to see the latest price.

Conclusion

There are many models of 10000 mAh capacity. To help you clarify,

  • PowerCore is the basic
  • PowerCore Speed has the technology of Quick Charge 3.0 for only output
  • PowerCore+ has Quick Charge 3.0 for both input and output
  • PowerCore II has the technology of PowerIQ 2.0, which is equivalent to Quick Charge 3.0 for both input and output

To recharge PowerCore+ or PowerCore II at the fastest speed possible, use Anker Quick Charge charger. But, none of the models here includes a wall adapter. The prices of all these models aren’t much different. So, either PowerCore+ or PowerCore II is recommended.

Related post