Anker is a brand that designs and sells consumer electronics. Their mobile charging products such as portable chargers and wall adapters are famous and popular.
PowerIQ is an Anker’s exclusive technology, which automatically optimizes the flow of current depending on connected devices.
VoltageBoost is another Anker’s exclusive technology. A cable resistance reduces the charging speed. VoltageBoost is the technology that smoothes the voltage output and lessens the effect of cable resistance.
Thanks to these technologies, you can charge your devices at highest possible speed. Their products can also be recharged quickly by using wall chargers equipped PowerIQ and VoltageBoost. Anker has released many portable chargers. Even for pocket-sized (less than 3350 to 6700 mAh) portable chargers, there are many. Here is the post for Anker Pocket Size Portable Chargers Comparison.
PowerCore+ Mini 3350
- Capacity: 3350 mAh / 12.06 Wh
- Output: 5V / 1A
- Input: 5V / 1A
- Dimension: 3.7′ x 0.9″ x 0.9″
- Weight: 3 oz
- Recharging time: 4 hours with 1 A or higher output charger
- Features: PowerIQ, VoltageBoost
- In the box: PowerCore+ Mini, Micro USB cable, Travel pouch, Welcome guide
- Price: $19.99
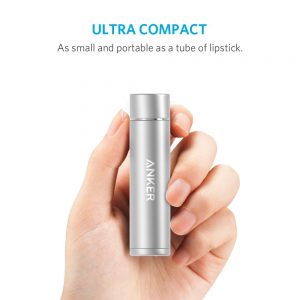 PowerCore+ Mini is the Anker’s smallest portable charger. The lipstick-size charger is easy to carry around in a pocket, bag, purse, etc. A color LED indicator light shows the status of the charger. When recharging, it stays Yellow. When it turns Green, it’s recharged fully. When connecting and charging mobile devices, Green means 50% to 100%, Yellow means 20% to 50%, Red means 5% to 20%, and flashing Red means less than 5%. Its 3350 mAh capacity may not be enough to charge recent smartphones from 0% to 100%. For example, it can charge only 80% of Samsung Galaxy S6. You may want to consider the charger as an emergency or backup until you will be able to access to wall outlets. Click here to see the latest price.
PowerCore 5000
- Capacity: 5000 mAh / 18.5 Wh
- Output: 5V / 2A
- Input: 5V / 2A
- Dimension: 4.25″ x 1.3″ x 1.3″
- Weight: 4.7 oz
- Recharging time: 2 to 3 hours using a 2 A or higher output charger
- Features: PowerIQ, VoltageBoost
- In the box: PowerCore 5000, Micro USB cable, Travel pouch, Welcome guide
- Price: $21.99
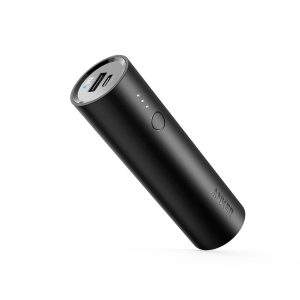 PowerCore 5000 is a cylindrical charger. I don’t mind the 4.25″ length, but 1.3″ diameter is a little too fat for a stick-shape charger. It’s not comfortable when I put it in a front pocket of jeans. You can check the remaining charge on 3-dot led indicator. Its capacity is large enough to charge most smartphones from 0%. Although the capacity is larger than PowerCore+ Mini 3350, you can recharge PowerCore 5000 faster when using a 2 A or higher output charger. It’s suitable for those who go home every night, but not sure if a smartphone’s battery lasts until you get home. Click here to see the latest price.
PowerCore Slim 5000
- Capacity: 5000 mAh / 19.25 Wh
- Output: 5V / 2A
- Input: 5V / 2A
- Dimension: 5″ x 2.5″ x 0.4″
- Weight: 4.2 oz
- Recharging time: 3.5 hours using a 2 A output charger
- Features: PowerIQ
- In the box: PowerCore Slim 5000, Micro USB cable, Travel pouch, Welcome guide
- Price: $29.99
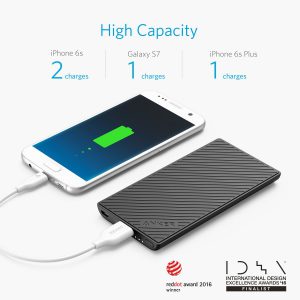 It’s another 5000 mAh charger, but it has an entirely different design. According to Anker, this flat charger uses the same technology as iPhone’s internal batteries. The overall size is almost the same as a smartphone. And, it uses an anti-slip silicone on a rear panel. It grips your phone with no rubbing or scratching when you put together in your back pocket. It has the 3-dot LED indicator to show the remaining power of the battery. It can charge most smartphones fully. If you are looking for a 5000-mAh-charger, you can pick one between this slim and cylindrical version to your preference. Click here to see the latest price.
Astro E1 (Upgraded version 6700 mAh)
- Capacity: 6700 mAh / 24.79 wh
- Output: 5V / 2A
- Input: 5V / 1A
- Dimension: 3.8″ x 1.7″ x 0.9″
- Weight: 4.4 oz
- Recharging time: 5.5 hours using a 1 A output charger
- Features: PowerIQ
- In the box: Astro E1, Micro USB cable, Travel Pouch, Welcome guide
- Price: $19.99
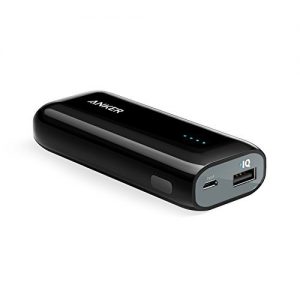 Astro E1 has upgraded from 5200 mAh to 6700 mAh. The previous version is no longer available to purchase. This candy size portable charger has enough to charge smartphones 1.5 to 2 times, and it may give a full charge to a tablet. The 4-dot LED indicator shows the status and the remaining of the battery. If you are looking for a 6700-mAh-charger, you may want to consider the next one shown below. Click here to see the latest price.
PowerCore II 6700
- Capacity: 6700 mAh / 24.79 Wh
- Output: 5V / 2A
- Input: 5V / 2 A
- Dimension: 3.8″ x 1.7″ x 0.9″
- Weight: 5 oz
- Recharging time: 3 hours using a 2 A output charger
- Features: PowerIQ
- In the box: PowerCore II 6700, Micro USB cable, Travel pouch, Welcome guide
- Price: $25.99
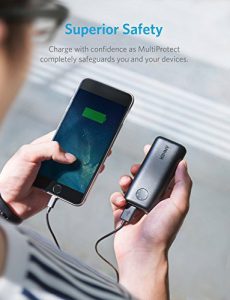 PowerCore II 6700 has the same capacity as Astro E1. The design is almost identical except for the battery indicator. It has the 6-dot LED to show the battery status which can give you more detailed information than the 4-dot. As another advantage, it takes a 2 A current when recharging. As a result, PowerCore II 6700 can be recharged around two times faster than Astro E1. So, if the prices are not much different, you should choose PowerCore II 6700 over Astro E1. Click here to see the latest price.
PowerCore Fusion 5000
- Capacity: 5000 mAh / 18.5 Wh
- Output: 5V / 2.1 A (when plugged into AC), 5V / 3 A (when not plugged into AC)
- Input: 100-240 V / 0.5 A 50-60 Hz (AC input), 5V / 2A (micro USB input)
- Dimension: 2.8″ x 2.8″ x 1.2″
- Weight: 6.72 oz
- Recharging time: 2.5 hours using AC outlet
- Features: PowerIQ, VoltageBoost
- In the box: PowerCore Fusion 5000, Micro USB cable, Travel pouch, Welcome guide
- Price: $29.99
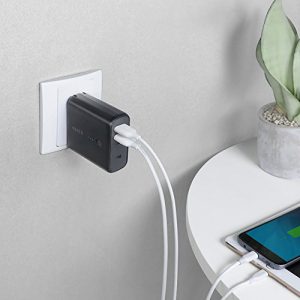 PowerCore Fusion 5000 is not only a portable charger but also a wall adapter with two USB output ports. You can recharge it directly from a wall outlet by using a fold-able plug on the back. You can connect and charge your mobile devices when it’s plugged into a wall outlet. If you do so, connected devices are getting charged first, and then the Fusion starts getting charged when connected devices are at 100%. You can also recharge in the same way as portable chargers using the Micro USB input port on the front. The 3-dot LED indicator shows the remaining power of the battery. As long as the capacity of 5000-mAh is enough for you, PowerCore Fusion 5000 is the best portable charger for travelers. Click here to see the latest price.
Related post
- How to choose a portable charger for your devices
- Anker Powerbank Portable Charger Comparison (Compact size 10000 and 10050 mAh)
- Anker Powerbank Portable Charger Comparison (Mid-size 13000 to 15600 mAh)
- Anker Powerbank Portable Charger Comparison (High Capacity 20000 and 20100 mAh)
- Anker Powerbank Portable Charger Comparison (Highest Capacity 26800 mAh)
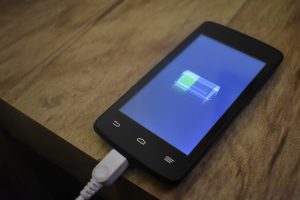 Mobile devices like smartphones and tablets make our lives much more convenient. Manufacturers of these devices consider and weigh battery life and size and then create a design which is supposed to be compact enough to make overall design attractive while it has enough capacity for average use. For those who spend their time indoor such as home, office, cafe, and school, you may have no problem to find a place to charge your devices. But, while you go traveling, camping, or other outdoor activities, a portable charger is a must. Although they go under different names such as Battery Parks, Power Banks, Portable Charger, or Backup Charger, they are all the same thing. Here are some things to consider when you choose a portable charger.
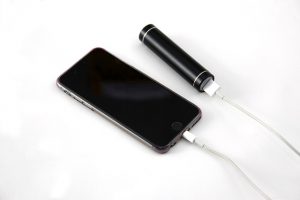 The capacity of portable chargers is also shown in mAh. It’s commonly ranging from 2000 mAh to 20000 mAh. The more capacity, the larger and heavier. If you need to charge iPhone X with 0% battery, you will need at least 3000 mAh portable charger. But, after charging the iPhone X from 0%, there is no juice remaining in the portable charger. If you go camping in the back-country for three days, you will need a portable charger with a capacity of 10000 mAh or more. And, keep in mind that larger devices like tablets or laptops contain a much larger battery. So, you will need a portable charger with a larger capacity accordingly.
 If you have multiple mobile devices and need to charge them simultaneously, you will need to make sure how many USB ports a portable charger has. In general, the larger portable charger is, the more USB ports it has. A small stick charger with around 2000 mAh capacity usually has only one. A charger with a capacity ranging from 5000 to 15000 mAh typically has two. A charger with 15000+ mAh has three or more. Think about the situation you are charging the devices. For example, when you go hiking with a smartphone and GoPro. A GoPro’s battery probably runs out first. You take a rest and charge the GoPro, but it’s a good time to charge your smartphone as well although it’s not dead yet. In short, it’s better to choose a portable charger with the same numbers of USB port as numbers of devices you carry.
 Any portable charger has a USB port or multiple ports to output the power to your mobile devices, but the amount of juice provided through it varies from model to model. Most smartphones require a 1 A (=1000 mA), but a 2.4 A is ideal for charging most smartphones at the fastest possible speed. It’s called Optimal Charging. Larger devices like tablets can be charged via a 1 A USB port, but it’s slow. It’s ideal to use the charger with at least 2 A USB port. The 2 A USB ports can charge two times faster than the 1 A USB port.
 A charging time here is mentioning about the time required to charge a portable charger itself. The amount of input also varies from model to model. It’s ranging from 1 A to 2.4 A. Simply, the larger number input, the faster it will charge. Most wall outlet can deliver 2.4 A. So, it’s better to choose a portable charger with a larger number input, especially a portable charger with high capacity. For example,
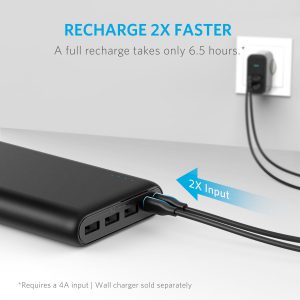
 With a USB cable, you can recharge a portable charger from any USB port. However, USB ports on the computer don’t output much amount of juice. It’s ranging from 500 mA to 1 A. On the other hand, most wall outlet can deliver up to 2.4 A, but it requires a wall adapter to convert power from wall outlet to USB outlet.
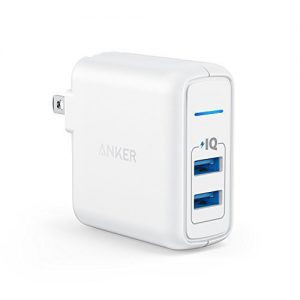 Most portable chargers don’t include a wall adapter. You may keep many wall adapters come with electronics you purchased, but are they suitable for the portable charger you’re going to buy? See the output spec printed on wall adapters. You can use any wall charger for a recharge, but the larger number a wall charger output, the better (faster) especially for a high-capacity portable charger. As a tip, try to find a wall adapter come with the larger device you purchased the most recently. For example, iPad Pro includes a 2.4 A wall adapter. Samsung Galaxy Tab S3 includes a 2 A wall adapter.
 If you need to carry around a portable charger in your pocket all day, its design and weight would be significant factors when you choose a portable charger. Since portable chargers are trending more and more stylish and slimmer, you will be able to find your favorite design easily.
 The viewfinder grid lines help you improve your photography. You can easily align an object horizontally or vertically. The object is set right where you want it to be. So are the things in the background. Open Camera > camera settings > Grid lines
 Samsung S9’s camera has a dual-aperture system. There are f/1.5 and f/2.4 aperture. The f/1.5 can take a picture in low-light condition. However, the wider the opening for light to enter, the harder it is to shoot the entire scene looking crisp and sharp. Sometimes, the camera focuses on something you don’t want it to, and the main object is out of focus. To deal with the problem, all you need to do is tap on the portion of the scene which you want to focus before shooting. It’s important especially when you shoot in low-light condition.
 Let enough light in– Slo-Mo video captures nearly one thousand frames per second. It means that the amount of light getting into the camera is significantly reduced. Thus, you should consider shooting outside or well-lit room when you capture Slo-Mo’s 960 fps videos.
 Multi-take or Single-take – You can choose between a single Slo-Mo video or multiple Slo-Mo videos to be captured in the same clip. The single-take is simple enough to manage and edit. And the multi-take is useful if there are moments you want to capture in a short time. You don’t have to stop and start a new recording for each Slo-Mo video.
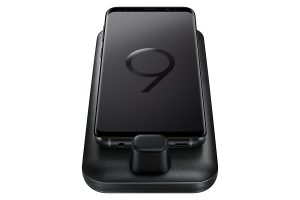 Samsung DeX Pad will be released on April 30th, 2018. It turns your latest Galaxy smartphone
 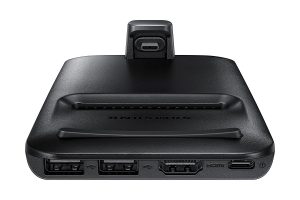 Both the Station and Pad charge your phone during operation via USB-C port. And they both have two USB ports and one HDMI port and USB-C port for power. But, Dex Pad has no Ethernet port which exists on the back of the Station. A smartphone can get access to the internet via WiFi, so Ethernet may not have been necessary since Dex Station in the first place. Thanks to not having Ethernet, the device can be compact and light.
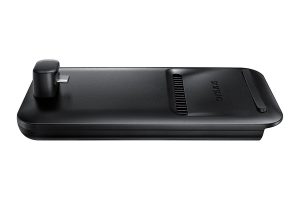 As a disadvantage, Dex Pad can’t use fingerprint scanner because of the orientation. The iris scanner works while in use, but you may need to lean over to the display of the smartphone or lift up the smartphone connected to Dex pad or type PIN or draw a pattern. For Dex Station, the display of the smartphone is facing you. You only need to take a look at the display to unlock. Dex Station was released along with S8. And S8 is the first Galaxy smartphone to have a feature of iris scanner. Dex Station takes advantage of the new feature and gives you more futuristic experience.
 In late 2017, Facebook announced a new virtual reality headset that was positioned in the middle between Oculus Rift and Gear VR regarding price and feature. It’s called Oculus Go. It’s an entirely stand-alone device meaning that doesn’t require a PC to be hooked up or a smartphone to be slipped into the headset.
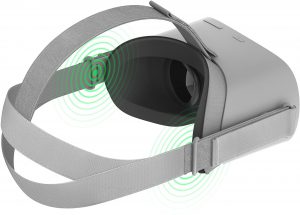 The headset is super lightweight. The new, soft, and breathable fabric is used for the facial pad. Build-in speakers are another benefit that makes Oculus Go as a stand-alone VR headset. For those who want to use their headphones, there is a 3.5 mm audio output.
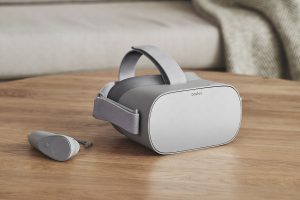 There is no touchpad on the side of the headset. Gear VR has one because it was released in the early stage of VR development. Playing VR games with the touchpad on the side of the headset ruins an immersive experience. After the release of the Gear VR’s controller, fewer people use a side touchpad for VR games. Thanks to the controller, new Oculus Go doesn’t need a side touchpad.
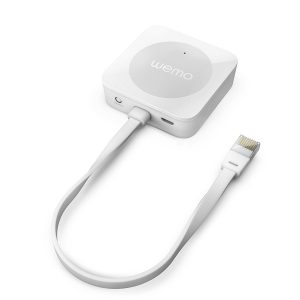 The Belkin, Wemo’s manufacturer, first promised Apple HomeKit support for their Wemo smart home devices back in May 2017. After a delay, Wemo bridge is now available to purchase.The bridge is simple enough. It connects to your home WiFi network using an Ethernet cable and then allows you to control Wemo devices with the Home app and Siri.
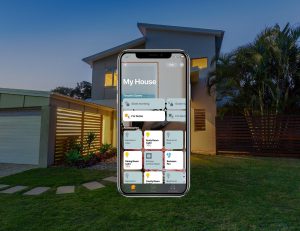 Setting up is a breeze, just like other Apple HomeKit compatible devices. With everything plugged in (ethernet and micro USB for power), open the Home app. Tap + to add a new accessory. The camera turns on automatically. Point it at the code on the back of the bridge. Now, the bridge is added to your Apple HomeKit. Proceed to the next screen. It shows all Wemo devices in your WiFi network. You don’t need to add individual Wemo devices into the Home app. The bridge automatically imports them for you. You can configure each device, rename, or make a group to assign it to each room.
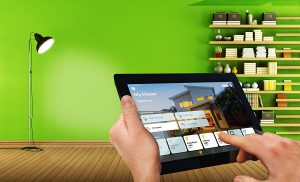 Now, you can control Wemo devices with the Home app and Siri. HomeKit support means you can not only control Wemo devices alone but also make them work with any devices from other brands you may have been using in your home. Wemo devices can be a part of HomeKit scenes or schedule along with other smart home devices.
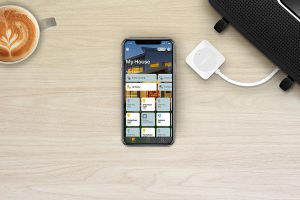 If you are an iOS user and already purchased Wemo devices, there is a no-brainer of buying the bridge so you can control them with the Home app and Siri. However, it’s worth noting that Amazon Alexa and Google Assistance don’t require the bridge to control Wemo devices in the first place. And, the inexpensive smart speakers, such as Echo Dot, Google Home mini cost almost the same price as the bridge.
