How to choose the best Smart Plug for you

There are many smart plugs on the market. It may be overwhelming when you choose what the best for you is. It’s been a while since they were released. And they got enough reviews for you to read and evaluate before buying them. Here are details and comparison of some popular smart plugs. If you have iOS devices and want to controlled with Siri, please read “The Best Smart Plugs compatible with Apple HomeKit and Siri.” and Wemo Bridge makes it compatible with Apple HomeKit and Siri

TP-Link Smart Plugs

TP-Link Smart Plugs use your home Wi-Fi network. And that’s all you need. No hub required. A free mobile app is used for a setup, and it controls smart plugs. Currently, there are three types of smart plugs from TP-Link.

To use the smart plugs, you need to install an app called Kasa for Mobile. It is available at Google Play Store and Apple Appstore. You can not only switch on/off your electric devices but also make a schedule to turn on/off automatically or set countdown timers.

HS100 and HS110 are the same sizes, but HS110 has a feature of Energy Monitoring. This feature allows you to monitor real-time and past power consumption of an electric device which is plugged into the HS110 smart plug.

HS105 is a small version of HS100 (w/o energy monitoring.) While HS100 and HS110 are too big to be plugged into multiple sockets in the same outlet or power strip, HS105 is slim enough to be plugged into multiple sockets in most wall outlets or power strips. And HS105 is the only version among TP-Link smart plugs which has a physical button to power on/off. The button is also used for activating a set-up mode or factory reset. There is a button on HS100 and HS110, too. But they are for only a setup mode or factory reset.

All TP-Link Smart Plugs work with Amazon Alexa. With Skill “TP-LINK Kasa” enabled, you can power on/off electric devices by saying, “Alexa, turn on/off [name of device].” You can also create groups in Alexa app. Give a group a specific name, and you can power on/off multiple devices at a time by saying, “Alexa turn on/off [name of group].”

Unfortunately, TP-Link Smart Plugs are not compatible with Apple HomeKit. You can’t control them with Siri. And, they are not compatible with IFTTT, either.

Wemo Smart Plugs

Wemo is a series of smart home devices from Belkin. And it also has three types of smart plugs

You can control Wemo Smart Plugs with Wemo mobile app. It’s available at Google Play Store and Apple Appstore. Just like TP-Link’s Kasa app, you can switch on/off, and there are features of scheduling and timer. F7C027fc (Wemo Switch) is the basic one. F7C063 (Wemo Mini) is a small version which won’t cover other sockets in the same outlet or power strip. F7C029fc (Wemo Insight) has an energy monitoring feature. They all work with Amazon Alexa, but they are not compatible with Apple HomeKit.

It seems that smart plugs of Wemo and TP-Link are very similar, but Wemo has some more features than TP-Link does. First, all Wemo smart plugs have a physical button to turn on/off. Second, you can control Wemo smart plugs with Nest’s “home” and “away” modes. Lastly, it’s compatible with IFTTT.
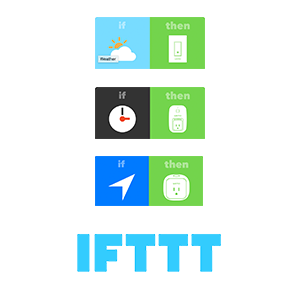
Wemo + IFTTTIFTTT is a free web-based service that connects one app with another. You can make Applets (formerly called Recipes) like “At sunset, turn on Wemo smart plug” or “Get a notification when Wemo turns on.” Since Wemo Insight has an energy monitoring feature, you can make unique Applets related to this feature like “Send an email when a daily power costs more than you expected.” Wemo can be used as both Triggers and Actions. Here is the full list.

Triggers

  • Switch on
  • Switch off
  • Standby mode entered (Wemo Insight Only)
  • Daily minutes on is longer than (Wemo Insight Only)
  • Daily cost rises above (Wemo Insight Only)
  • Monthly estimated cost rises above (Wemo Insight Only)

Actions

  • Turn on (If it was on, it stays on)
  • Turn off (If it was off, it stays off)
  • Turn on then off
  • Turn off then on
  • Toggle on/off (If it was on, it turns off. If it was off, it turns on)

Other Types of Smart Plugs

Etekcity Wireless Remote Control Electrical Outlet Switch ($30)

Etekcity Outlet Switch is controlled by an RF (radio frequency) remote. The item contains 5 outlet switches and 2 remotes. Using the remote is the only way to switch on and off. They don’t use with mobile apps or Wi-Fi. So, the item is very isolated. There is no way of using the item with other smart home devices. So, it’s, strictly speaking, not smart plug. However, the price is much lower than Wi-Fi smart plugs. It’s useful where Wi-Fi is not available or for an occasional or seasonal use like a party and Christmas illuminations.

GE Bluetooth Smart Switch ($35)

GE Smart Switch uses Bluetooth of your smartphone or tablet. A free app called Avi-on, available at Google Play Store and Apple Appstore, can not only switch on/off but also make a schedule and set a timer. Unfortunately, it’s not compatible with Amazon Alexa or IFTTT. As Etekcity Outlet Switch, it’s useful where there is no Wi-Fi connection. Plus, the features of scheduling and timer allow you to use the item in a more creative way than Etekcity Outlet Switch.

Conclusion

TP-Link and Wemo smart plugs are good items to start your home automation. There is no need of the hub or any other devices. All you need is a Wi-Fi connection. If you have Amazon Alexa-enabled devices, you can control them with your voice. The biggest difference between TP-Link and Wemo is whether or not it has an IFTTT compatibility. Both brands are reliable. But if you want to use IFTTT, choose Wemo. If you want to use two or more smart plugs on the same outlet, TP-Link HS105 or Wemo Mini will do. For energy monitoring, TP-Link HS110 or Wemo Insight. If you just need standard ones for lower prices, TP-Link HS100, Wemo Switch or multiple-pack.

Logitech Harmony Hub-Based Products Troubleshooting

While Harmony Hub-based products are very sophisticated and versatile, the setting can be difficult and functions are sometimes wonky. Here are some issues and solutions for Logitech Harmony Hub-based products.

No response to any commands from the remote

When the remote stops sending commands, rebooting the remote will fix the problem. Rebooting the remote won’t erase any settings such as devices and activities you have created.

How to Reboot the remote

  • Press and hold “Off” button for approximately 15 seconds

Can’t discover hub, or devices

When Harmony app can’t discover the hub or the hub can’t discover new devices, rebooting the hub sometimes fixes the problem. Rebooting the hub won’t erase any settings such as devices and activities you have created. (Rebooting the router often fix Wi-Fi connectivity issues, too)

How to Reboot the hub

  • Disconnect the power cable
  • Wait 10 seconds
  • Reconnect the power cable (the hub takes 30 seconds to power back on)

Harmony Hub frequently disconnects from Wi-Fi

If Harmony Hub successfully connects to Wi-Fi, but often disconnects, move the hub closer to the router. And keep in mind that any other electronics interfere with Wi-Fi network more or less. Move the hub away from them. Especially, microwaves, baby monitors, and cordless phones are well known for ones that interfere with Wi-Fi network.

Activities doesn’t start properly

When starting activity, Harmony turns on all devices for that activity, but it fails to change correct inputs. If so, you have to change delay settings to increase the time to make Harmony wait for sending a next command.

For example, activity “Watch TV’ uses an antenna input on TV, and “Watch DVD” use an HDMI input on TV. It takes 15 seconds for TV to start up and get ready to receive any commands. Without a delay setting, “Watch DVD” successfully turns on a TV and DVD player. But it fails to change input from Antenna to HDMI because when Harmony sends the command, TV is starting up and not ready to received for any commands. In this case, you will need to increase TV’s Power on delay to at least 15 seconds.

You can do it on the remote with LCD such as Elite and Ultimate, or in Harmony mobile app or desktop app.

Change delay setting from the Remote

  • Open MENU (tapping icon at the corner either a pinion mark or three lines)
  • Tap “Settings” > “Devices” > “Delay Settings” > “Change Delays”
  • Select (tap) your device you want to change a delay setting
  • Choose (tap) among “Power on”, “Inter-key”, “Input”, and “Inter-device”
  • Use the slider to adjust a delay

Change delay setting from mobile app

  • Open MENU
  • Tap “HARMONY SETUP” > “ADD/EDIT DEVICES & ACTIVITIES” > “DEVICES”
  • Select a device and tap “FIX DELAY”
  • Use the slider to adjust a delay
  • Press “>” in the top right to confirm the changes

Change delay setting from desktop app

  • Sign in and select the remote from the gallery
  • Click “Devices” and select the device
  • Click “Change Device Settings” and “Next”
  • Enter the delay value
  • Click “Finish” and Sync your remote

Erratic, inconsistent responses on Roku

Some Roku devices come with a remote using Wi-Fi Direct. In my experience, controlling Roku Streaming Stick with Harmony Elite was so erratic and inconsistent at first. It was very frustrating. I wasn’t able to move the cursor smoothly. Every a few directional-key presses stopped responding for 5 to 10 seconds. Fast-forward or rewind the movies was always a disaster. I had never been able to stop and resume the movies where I would want it to.

This problem is easily solved by connecting your Roku to a 5GHz wireless router if you have a dual-band (2.4GHz and 5GHz) wireless router. Harmony hub is compatible with 2.4GHz Wi-Fi only.

Videos frequently stutter, pause on Fire TV

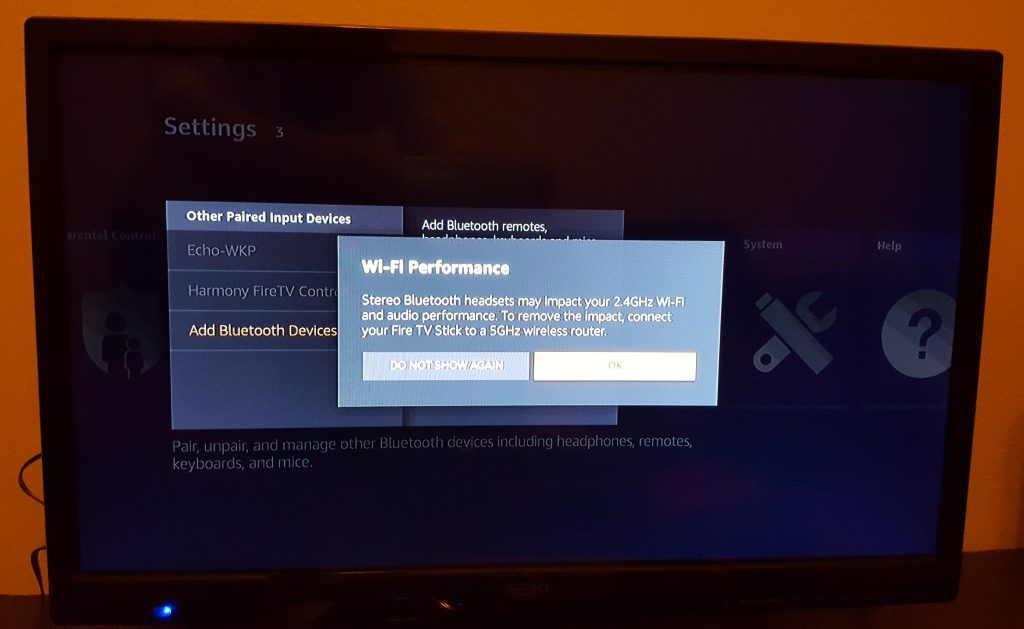
While playing videos, contents frequently stutter. Actually, this problem didn’t happen with Harmony remote. But It did happen when I added a Bluetooth headphone to Fire TV Stick.The problem was resolved by the same as Roku’s solution; connecting Fire TV Stick to a 5GHz wireless router.

solution to stuttering issue on Fire TV Stick

When you add Bluetooth devices to Fire TV, you will see the message in the picture above. And Harmony and Fire TV are connected via Bluetooth, too. If you have a stuttering issue, connecting to a 5GHz wireless router may fix the problem.

Factory Reset

If none of the solutions work, you may need to perform a factory reset as a last resort. It will erase all settings, devices, and activities you have created.

How to perform a factory reset

  • Press and hold “Menu” and “Off” buttons at the same time for approximately 20 seconds until you see a remote with a circular arrow
  • Sign in Harmony desktop app
  • Connect the remote to your computer with a USB cable
  • Select your remote from the Gallery
  • Follow the instructions in the app to restore firmware and settings

See Also: Logitech Harmony Elite review and comparison with Companion and Ultimate

Logitech Harmony Elite review and comparison with Companion and Ultimate

Logitech Harmony Elite ($350)  is the top line of Harmony product available today. It contains the Harmony Elite remote, the Hub, (2) IR blasters, a charging cradle, a micro USB cable and (2) AC adapters. The remote sends RF (radio frequency) to the Hub, so there is no need of line of sight. Then, the Hub sends IR (infrared), Wi-Fi, or Bluetooth depending on devices.

Set Up

You can set up the remote with your PCs or mobile devices connected to the internet. For PCs, you will need to plug it into your PC with a micro USB cable. For Android or iOS devices, the whole process can be done with Harmony app without a cable. Here, you can add up to 15 devices and create activities. Activities are a set of commands that turns on all necessary devices and select inputs on each device to play music, movie, game, DVD, etc. After creating activities, you can do these things by a single press on the remote.

For example, Activity “Watch Roku” will turn on TV, AV receiver, and Roku. And it will also change an input of TV to HDMI and an input of AV receiver to HDMI#1. Activity “Play Game” will turn on TV, AV receiver, and Xbox. And it will also change an input of TV to HDMI and an input of AV receiver to HDMI#2. When you change activities, it’s smart to turn off only devices that are not used for that activity and stay on or turn on necessary devices. For example, from “Watch Roku” to “Play Game,” it will only turn off Roku, turn on Xbox, and change an input of AV receiver to HDMI#2.

All settings are stored in Logitech cloud secured with a login name and password. You can access to it with any PCs or mobile devices with Harmony app.

Harmony Elite (the remote)

All buttons on the remote are backlit. Most controls are done with these physical buttons. In addition to the physical buttons, the remote has a touch screen LCD which is capable of doing the same controls as the physical buttons. And the display is also used to select Activities and Devices, or change remote mappings and configure additional settings.

A bottom of the remote has special buttons that control supported Smart Home devices. There are four buttons for devices and +/- button for adjustment. For example, if you make the remote remember one of Philips Hue light bulbs, pressing the button turns on the light, long-press to turn off, +/- button for changing brightness.

The remote has a built-in rechargeable battery. You can charge the remote with a micro-USB cable connected to the charging cradle or directly to the remote. A battery life of the remote is not long. It lasts about two days on a charge. It’s better to use the charging cradle and accustom yourself to put it back in the charging cradle when you are not using it. You can also change settings of the display to save the battery such as reducing brightness, making screen timeout shorter, and turning off Tilt sensor.

Harmony App (Android or iOS)

Logitech Harmony mobile appControl Smart Home devices with Harmony appHarmony mobile app is very sophisticated and versatile. As mentioned above, you can control everything the remote can do and set up or edit without connecting micro-USB cable to the remote. Plus, there is a keyboard when you search media more quickly rather than moving a cursor and pressing OK to enter every single letter. If you have Philips Hue color bulbs, you can change color in the app. I use the app only when I edit the settings or use the keyboard. For the other controls, I prefer to use the remote because it’s easier and more familiar to me. I hope there would be an update so that I could use a keyboard on the remote in the future.
Alexa Skill

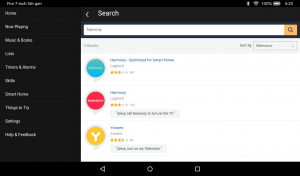
Harmony Skills for Amazon AlexaIf you have Amazon Alexa devices such as Echo and Tap, enable Harmony Skills so you can control entertainment devices with your voice. Though what you can do with your voice is very limited, some of them are useful, and it’s free. When you type “harmony” and search skills in Amazon Alexa app, you will see two Harmony skills either of which has a blue or red logo. Both are official skills for Logitech Harmony. The difference between them is whether or not you have to say “ask or tell Harmony to…” after saying, “Alexa.” The blue one doesn’t need to say that line. Instead, it’s fewer commands that you can use than the red one. For example,

  • “Alexa, turn on TV”
  • “Alexa, turn on (name of activity or device)
  • “Alexa, turn on (channel name or #)
  • “Alexa, turn off TV”

Changing channels can be used only on selected devices that can create Favorite, such as TV, cable box, and Roku. However, most of the time “Alexa, turn on (channel name or #)” command doesn’t work. It’s better to use the red one.

  • “Alexa, ask Harmony to turn on (channel name or #)” and you can also say
  • “Alexa, ask Harmony to play/pause” (while playing movie, music, etc)
  • “Alexa, ask Harmony to turn up/down the volume”

Other hub-based Harmony products

Logitech has some of the less expensive Harmony products. Harmony Companion ($150) includes the Hub, (1) IR blaster, USB cable, (1) AC adapter and the remote. The remote has no LCD. Instead, it has physical number buttons. And there are the same buttons for smart home devices as the Elite remote. It uses a coin battery (CR2032), and Logitech claims that it lasts a year. The buttons are not back-lit. You can add up to 8 devices and create 6 activities.

Another Logitech hub-based product is Harmony Ultimate Home ($350). It consists of the Hue, two IR blasters, charging cradle, two AC adapters, micro USB cable, and the remote. The remote has a touch screen LCD and backlit buttons. Unlike the remote of Elite or Companion, there are no physical buttons for smart home devices. Besides, it’s worth noting that many users complain about the layout of physical buttons on the remote. Most commonly used buttons, transport buttons (play/pause, fast forward/rewind, stop) and arrow keys & OK button, are somehow either on the very top or bottom. Thus, you have to move your hand on the remote very often. Speaking of features, it’s almost the same as the Elite. You may consider it as a predecessor of the Elite. It’s already discontinued by the manufacturer. So, you may find it at a good discounted price.

What about Harmony 300/650/700 Universal Non-Hub Remote?

There are many universal remotes released by Logitech. They are stand-alone products with no need of the Hub. These are better options than cheap and unbranded ones you can get from drug stores. But, they can control only entertainment devices controlled by IR remotes. There is no way to control devices using Bluetooth or Wi-Fi remotes like Amazon Fire TV or Roku Streaming Stick. You may copy basic remotes of electronics like a cooling fan and air conditioner, as long as they use IR. But, you can’t control smart home devices connected to Wi-Fi like Philips Hue, Nest, SmartThings, etc. If all devices you have are using IR remotes, Harmony Universal Non-Hub Remotes would be enough.

Conclusion

Logitech Harmony Elite is the best remote control for owners of multiple entertainment devices and smart home devices. Harmony Companion offers very appealing price. But without an LCD, you can’t see with which device the remote is currently working. Sometimes commands from the remote don’t work correctly. When it happens, you have to fix with the remote manually. It’s hard to do without a display. Harmony Ultimate Home is another hub-based product. If only you are comfortable with the layout of the buttons, it’s a good choice because of a discounted price.

How to use Amazon Alexa from anywhere with your smartphone – Reverb for Amazon Alexa

You don’t need Amazon devices like Echo and Fire tablet to use Amazon’s Voice assistance. You can talk to Alexa with nearly any device having a microphone, speaker and internet connection. Your smartphone would be an Alexa-enable device with an app called Reverb for Amazon Alexa.

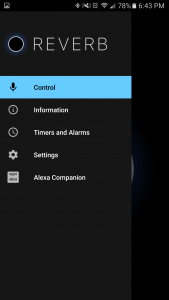
Reverb for Amazon Alexa iPhoneReverb for Amazon Alexa Android


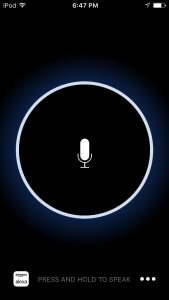
It’s easy to use. Open the app, then speak while you press and hold a mic icon. That’s it. Alexa answers your questions, provides traffic and weather reports, tells you scores and schedules of sports events.

You can control your smart home devices, too. If you don’t have an official Amazon Alexa app on your smartphone, install it (it’s free). Then you need to log in with your Amazon account. As long as smart devices are compatible with Alexa, you can control them with Reverb app as well. You can also enable and use Skills.

There are some drawbacks. Reverb app can’t play music or Skills that requires playing music. And unlike Siri on iOS devices, which allows you to speak to Siri by long-pressing a home button, there is no way to use the app without unlocking a smartphone and opening the app. And there is no widget to make it easier to access to it.

Summary

The app, Reverb for Amazon Alexa allow to you to use Amazon’s Voice assistance with your smartphone. It doesn’t matter whether you own Amazon’s Alexa devices such as Echo, Tap, Fire TV, etc. Thanks to a data connection of a smartphone, you can use Alexa from anywhere. Thousands of Skills makes Alexa more useful and fun than other voice assistances like Siri, Google Home, and Cortana, which may be already integrated into your smartphone.

Reverb for Amazon Alexa is available at Google Play Store and Apple App Store.

List of Philips Hue light bulbs

It’s been years since Philips Hue lighting system was introduced. Since then, Philips has improved their products and added many new lineups. Though light bulbs are just one part of their system, there are so many different types that you might get confused. To make things clear, here is a list of Philips Hue light bulbs.

Hue White A19 (455295)

Hue White is the most basic and inexpensive light bulb among Philips Hue products. It’s available to buy individually. At 800 lumens, this A19 bulb consumes only 9.5W. It’s equivalent to a 60W incandescent bulb. It can’t change the color, but it’s dimmable. Though its name says “White,” an actual color is yellow or yellowish white. If you need white color, this is not one for you. Hue White A19 costs $15.

The bulb is also found in the two bundles. One of them is Philips 455386 Hue Wireless Dimming Kit ($35) including one bulb and one Dimmer Switch. It’s worth noting that a bulb and switch work out of the box. You can turn on/off or dim the light directly without the bridge. Each switch can control up to ten light bulbs. However, you can’t control the light with Philip Hue app from your smartphone. To do so, you will need the bridge.

Another one is Philips 455287 Hue White A19 Starter Kit ($70). It includes two bulbs and a 2nd Gen Bridge. With the bridge, you can add more accessories like a motion sensor or Tap switch and control with smartphone’s apps, Apple Home Kit, or Amazon Alexa.

Hue White and Color Ambiance A19

It’s believed to be the most popular light bulb of all. Hue White and Color Ambiance ($50) can display millions of colors and thousands of shades of white from warm to daylight (=yellow to white). Hue White and Color has improved through three generations. Here is the difference.

  • 1st Gen (426361) – 600 lumen, 2000-6500 Kelvin
  • 2nd Gen (456202) – 800 lumen, 2000-6500 Kelvin (200 lumen brighter than 1st gen)
  • 3rd Gen (464503) – 800 lumen, 2000-6500 Kelvin (having richer and deeper in green, cyan and blue than 1st and 2nd gens)

All generations of bulbs have a bundle version including three bulbs and one bridge. Here are the details

Any generation of bulb works with any generation of the bridge. However, 1st gen bridge is not compatible with Apple HomeKit or Philips Hue Skill of Amazon Alexa. (You can still make basic controls like turning on/off or dimming with voice command to Alexa, but can’t use features of Skill. See details here.) An original price of Philips Hue White and Color Ambiance Starter Kit is $199. Probably, you can find older versions at good discounted prices.

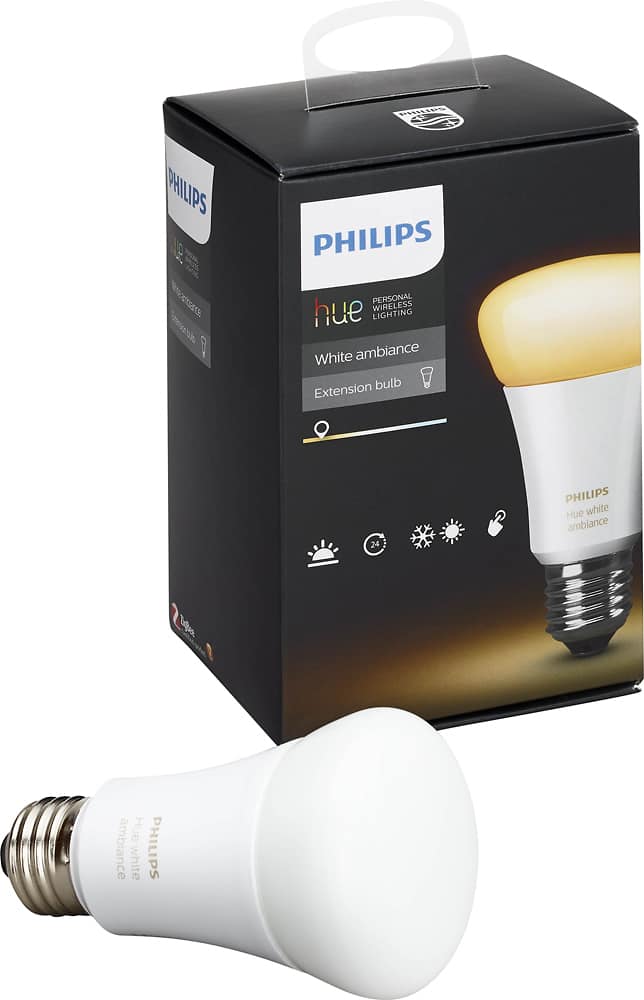
Hue White Ambiance A19 (461004)

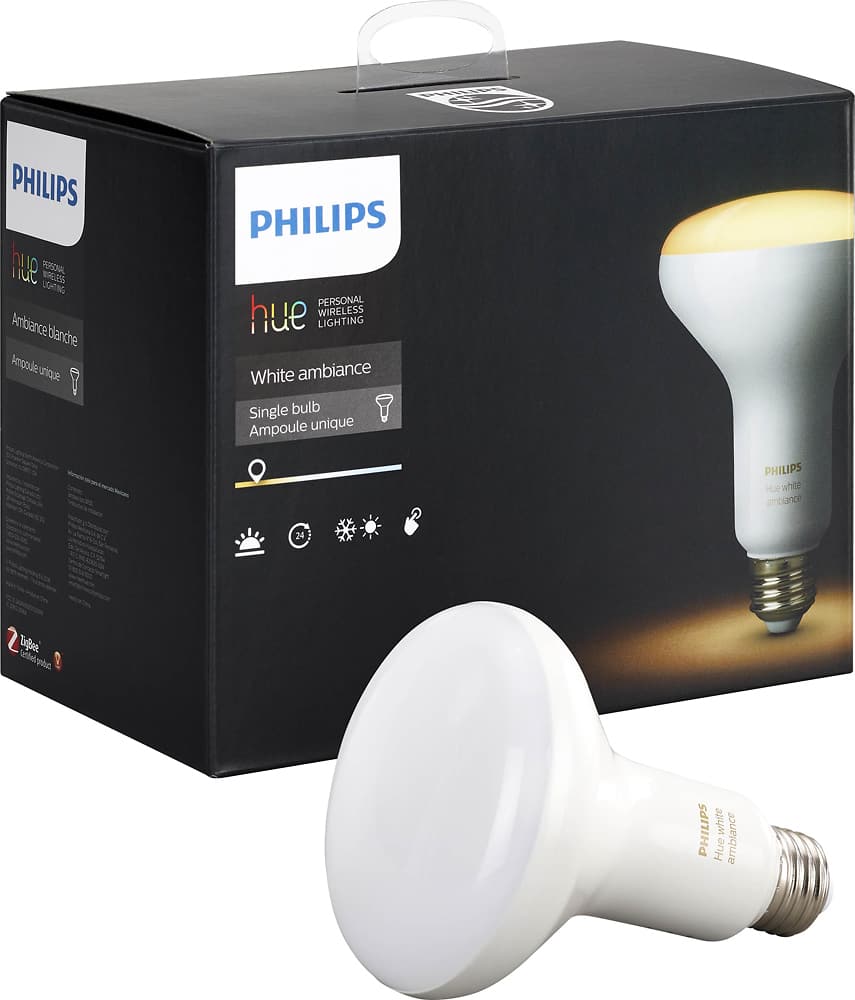
Philips - 800-Lumen, 10.5W, Tone Philips hue white ambiance A19 LED Light Bulb - White - AlternateView11 Zoom

Hue White Ambiance A19 ($30) is one between Hue White and Hue White and Color. It can’t change the color, but it can change the shade of white from warm to cold color temperatures (2200-6500 Kelvin.) As a result, it can display four pre-set light recipes, Relax (amber), Read (yellowish white), Concentrate (white), and Energize (bluish white).

The bulb is also found in two bundles. One of them is Philips 466706 Hue Light Recipe Kit ($50) including one bulb and one Dimmer Switch. A dimmer switch is pre-programmed, so you can use four pre-set light recipes without the bridge. When you press ON, it turns on to the last state. A second press turns on Relax, third to Read, fourth to Concentrate, and fifth to Energize. If you have the bridge, you can re-program the switch with smartphone’s app.

The other bundle is Philips 460989 Hue White Ambiance Starter Kit ($130) including two bulbs, one Dimmer Switch, and the 2nd gen Bridge. With the bridge, you can control the lights with smartphone’s apps, Apple HomeKit, or Amazon Alexa.

Hue White and Color Ambiance BR30 (456665)

image of philips hue white and color ambiance 1st gen br30

Hue White and Color Ambiance BR30 ($60) is a flood light for recess ceiling lighting fixtures. At 630 lumens, it’s equivalent to a 65W incandescent bulb, and it consumes as little as 7W. It can change millions of colors and thousands of shade from 2000 to 6500 Kelvin. You can consider it as a BR30 version of Hue White and Color Ambiance, but its spec is close to 1st gen’s bulb.

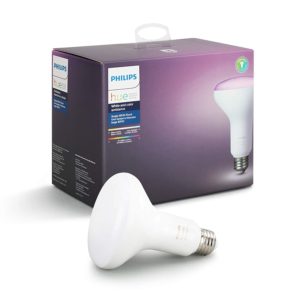
image of philips hue br30 color 3rd

Like A19 bulb, 3rd Gen BR30 bulbs is widely available on the market. Hue White and Color Ambiance BR30 (3rd Gen) ($50) has also richer colors than previous versions and slightly brighter at 650 lumens. And, it looks much sleeker because it no longer has a silver heat sink.

You can buy the bulb individually or a bundle. Philips 432278 Hue BR30 Starter Kit ($199) includes three bulbs and the 1st gen bridge. Please keep in mind that 1st gen bridge is not compatible with Apple HomeKit or Philips Hue Skill for Amazon Alexa.

Hue White Ambiance BR30 (464438)

Philips - Hue White Ambiance BR30 (2-Pack) - Adjustable White - AlternateView12 Zoom

BR30 version of Hue White Ambiance. Just like A19 version, it can’t change the color. But it can change the shade from 2200 to 6500 Kelvin. You can get a single Hue White Ambiance BR30 for $30 or 2-pack (466508) for $50.

Other Hue light bulbs

philips hue gu10 par16

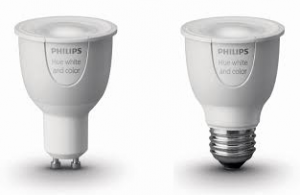
There are some other types of bulbs. GU10 and PAR16 are both spot lights. They are used for lighting fixtures designed to produce a directional light. The difference between GU10 and PAR16 is a shape of the base.

Hue Bluetooth

There are new additions to Philips Hue products. They have a built-in Bluetooth so they can connect to your smartphone’s app and work without Hub (Bridge). Bluetooth version is available on both A19 and BR30, White, White Ambiance, and White and Color Ambiance.

Read Also: Philips Hue Bluetooth Light Bulbs work without Hub or Bridge

Conclusion

Most Philips Hue light bulbs are either “White and Color Ambiance” or “White Ambiance”. While “White and Color Ambiance” can change the color and shade, “White Ambiance” can change only shade. Hue White is the only exception. It can’t change either color or shade. It can only dim. A19 is a standard shape of light bulb which can fit many fixtures including ceiling, desk lamp, floor lamp, etc. BR30 is a flood light which is best for recessed lighting fixtures. GU10 and PAR16 are spot lights which are for lighting fixtures designed to produce a directional light.

Read Also: Philips Hue Outdoor Lighting – bring smart light to your garden, porch, backyard, etc

3 Reasons Samsung Gear Fit 2 is the Best for Runners

Gear Fit 2 is the second version of fitness wristband from Samsung. It has many improvements over the predecessor, Gear Fit. A wider display allows you to see and read the information in a vertical orientation. The display of the first Gear Fit always shows horizontally, which makes you feel a little awkward to read. Gear Fit 2 has an IP68 rating while Gear Fit has IP67. It means Gear Fit 2 has a better rating of water-resistant. According to Samsung, it may be submerged in up to 5 feet of water for 30 minutes. However, the wristband is not for swimming, but you may use it in the rain, or it would be okay with an accidental drop to the water.

Aside from basic features such as a heart rate sensor, pedometer, receiving notifications or automatic detection of your activity, which are common and found in many other fitness wristbands, Gear Fit 2 has more features which you may want to choose it over other fitness bands. Here are 3 reasons Gear Fit 2 would be the best fitness wristband for you.

#1 iOS Support

In January 2017, Gear Fit 2 (along with Samsung smartwatch Gear S2 and S3) is now compatible with iOS. The same apps are available in Apple App Store. Gear Fit app is for Gear Fit 2, and the Gear S app is for Gear S2 and S3.

#2 Built-in GPS

Gear Fit 2 has a built-in GPS. It means that you don’t have to carry your smartphone to track route and distance you are running or walking. Fitbit Charge 2 ($149.95) doesn’t have a GPS, so it needs to be connected to your smartphone’s GPS to track route and distance. Here are some (not all) fitness wristbands which have a built-in GPS.

#3 Music Player

Thanks to a built-in GPS, you can leave a smartphone at home when you run, walk, or ride a bicycle. Back then, let’s say five years ago, smartphones are smart enough to meet requirements for outdoor runners like GPS, fitness apps, Bluetooth, and music. Now that fitness wristbands have a built-in GPS, they must have a music player, too. Unfortunately, fitness wristband with these features isn’t many. In fact, none of three fitness wristbands above (Surge, Vivosmart, and Vivoactive) has a music player. They can control a music player of a connected smartphone. But that means you need to have a smartphone with you during activity.

Gear Fit 2 Storage

Gear Fit 2 has a music player and storage for music files. All you need to listen to music is a Bluetooth headphone. You can now ditch your smartphone during activity without any compromise. Of course, you can control smartphone’s music player like other fitness bands, too. You may find other wearables which have both GPS and music player, but those may be categorized in Smartwatch. Among fitness wristbands which have a sleek design, lightweight, and comfort during an activity, Gear Fit 2 is currently the only one with both features.

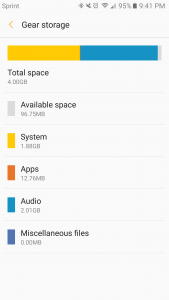
You can transfer music files to Gear Fit 2 from your smartphone. The total space of the band is 4GB, but nearly half of them is already used by “System.” I believe that around 2GB is more than enough for most people. The standard file formats are supported, such as MP3, WMA, AAC, OGG, etc.

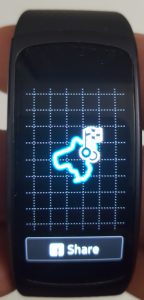
No Maps? storage may be almost full

Gear Fit 2 Route Map
No Map on Gear Fit 2

Speaking of the storage, you shouldn’t fill it up with music files. It will affect logs or maybe other performance of the wristband. In my personal experience, I couldn’t see maps in logs. Right after I bought and charged the wristband, I filled the storage almost entirely with music files and then go running. In logs, it showed the line indicating how I moved in a blank (grid) background. I thought that was normal. Until I saw a color map on my friend’s Gear Fit 2, I didn’t know that was a problem. I couldn’t find a solution on the web. After I tried some things, I finally got to know that too much storage caused it. Making more available space by removing some music files brought maps in all previous logs!

Conclusion

Gear Fit 2 is the best fitness wristband, especially for outdoor runners. It has all the features so that you can leave your smartphones at home. A large, yet sleek designed display is beautiful. No other fitness wristbands are comparable to it. A price $179 is definitely worth. But it’s been a while since its release. So, you may find a good discounted price!

Related Posts

CUVR Ultimate – The best Gear VR accessory for overheating problem

Overheating problem is inevitable when you play virtual reality contents on a smartphone. You may see a message popped up every 15 to 20 minutes that says a phone is overheating and you need to cool it down to continue. In my experience with Samsung Gear VR, it doesn’t happen when I watch contents like movies or even 360-degree videos which are already downloaded on the phone. But it does when playing games or watching 360-degree videos which are not downloaded but streaming.

Some mobile VR headsets have better designs for cooling. Gear VR is one of them. A smartphone is placed and held by holders on its sides. Unlike Google Daydream View, nothing is covering a smartphone and building up unwanted heat. However, due to heavy load to play VR contents, it overheats anyway.

Gear VR accessory for overheating problem

CUVR Ultimate is a cooling fan with wireless charging device for Gear VR. A bracket comes with the fan and fits a smartphone. The fan is attached to the bracket, not a headset. So the product is compatible with all versions of Gear VR.

See also: Difference between Gear VR 2015 and 2016 versions

Charge a smartphone at the same time

CUVR Ultimate is not only a fan but a wireless charging pad. It has a built-In rechargeable lithium battery. It powers the fan and charges a smartphone wirelessly at the same time. It takes around 3 hours to charge the product fully, and the fan works up to 6 hours.

Lightweight

It weighs 4.5 ounces. For comparison, a front cover of Gear VR (both SM-R323 and SM-R322) is 1.0 ounce. A 3″ x 5″ gel pack sold at amazon.com is 2.2 ounce. (6-pack for around $15) A cooling fan by Asterion Products weighs 4.2 ounces (also available on Amazon for around $35, non wireless charging, compatible with SM-R322 only)

Bracket fit your smartphone

Please note that a seller needs to know which model of phone you use. Since several models of Samsung Galaxy phones compatible with Gear VR have different sizes, the size of the bracket will be different for each phone. After you placed an order, the seller will send you an email. Reply and specify the model of your phone.

And the seller offers another bracket for $5 if you purchase another phone. Or if you have a 3D printer you can download 3D files from their website and 3D-print the bracket for yourself.

Conclusion

CUVR Ultimate is one of the best accessories of Samsung Gear VR. It eliminates overheating problem and allows you to play VR for hours with the feature of wireless charging. It consists of a built-in battery, wireless charging pad, and fan, but overall weight is relatively light. And the price $50 is a bargain.

Automatic Pro Car Adapter Review

(Update on 5/26/2020) Automatic Labs is shutting down. All their services such as vehicle tracking, crash alert, etc will be discontinued on May 28th, 2020. All information including shutdown, data export, the rebate can be found in the customer FAQ page of their website.

(Updated in August 2019, Automatic Pro was discontinued. The new adapter was released. It’s using LTE network instead of 3G.) Automatic Pro is an adapter plugged into vehicles diagnostic port called OBD port (or Data Link Connector.) All cars and light trucks sold in the United States in 1996 or later have this port. The purpose of OBD port is to pull off information from vehicle’s computer by using OBD scanners plugged into the port. Then, auto mechanics can start diagnosing emission related problems based on the information. Although Automatic Pro can pull off information to help you diagnose vehicles problems, its main feature is vehicles tracking.

Real-Time Tracking from anywhere

The adapter has a built-in GPS and 3G-network chip. They allow you to track a vehicle and record without a need of other devices such as smartphones or PCs. Logs are recorded in a cloud. You can access to them through an app. And you can also monitor a vehicle location in real time with the app.

Coverage map of Telefonica

The adapter works only in the United States right now. The 3G network of the adapter is Telefonica. The company doesn’t provide a coverage map, but according to Automatic customer support, it’s the same as AT&T and T-mobile coverage. If an area is covered by either AT&T or T-mobile 3G network, it should work. There is a very informative website that provides all cellular networks’ performance and coverage in the world. Go to https://opensignal.com/ to see coverage maps of AT&T and T-mobile.

No Contract, No Subscription for 3G Cellular Network

Automatic claims that 3G network is free for five years, but they don’t ever plan to charge a subscription fee after five years. For legal reasons, there has to be a time limit for subscription-free 3G network plan. You will be able to continue using the adapter without a subscription fee.

OBD Fusion for live data, customized instrument panel, etc

Many selected 3rd party apps are compatible with Automatic Pro. One of the apps called OBD Fusion shows many engine data which Automatic app doesn’t support. You can customize them on a display of smartphone and use it as a secondary or additional instrument panel. OBD Fusion costs $3.99 for Android and $9.99 for iOS devices.

Works with Alexa

With Amazon Alexa’s Skill “Automatic” enabled, Alexa will tell you a location of your car, fuel level, and how far you drove by saying:

  • “Alexa, ask Automatic where my car is.”
  • “Alexa, ask Automatic how much gas is left.”
  • “Alexa, ask Automatic how far I drove yesterday (or last month, this year, etc.)”

Connect with other apps with IFTTT

Automatic app can connect other apps to automate recording your drive or control smart devices through IFTTT. Events like turning on/off the ignition or enter/leave an area can be used as triggers. You can create “Applets” like:

  • If “New trip completed” then “Log on Google Drive spreadsheet.”
  • If “Turn off an ignition in the area” then “Set Nest thermostat to xx degree.”
  • If “Leave home” then “Turn off all Philips Hue lights.”

About previous versions of Automatic

Automatic has two previous versions, 1st and 2nd gen. Either version doesn’t have a 3G chip. So, they need a smartphone in a car that is connected to the adapter via Bluetooth. Although both versions rely on smartphone’s cellular connection for data logging and transfer, 2nd gen has a built-in GPS so you can retrieve data with a map and route. And it keeps up to 8 hours of driving data in case there is no connected smartphone in a car. Next time you bring a smartphone, these data will be retrieved. And 2nd gen is compatible with all 3rd party apps that you can use with Pro. Two versions work with a different app from Pro. It’s called “Automatic Classic.”

About newest version, Automatic Lite

There is one more version available only at Automatic website for $79.95. It’s called “Automatic Lite.” It works with the same app as Pro, “Automatic.” Lite is released most recently, but it lacks a lot of features. Lite doesn’t have a 3G chip, so you have to have a connected smartphone in a car. Like 2nd gen, it has a built-in GPS so you can retrieve up to 8 hours of data with map and route in case you forget to bring a phone. Lite seems pretty much the same as 2nd gen, but Lite is compatible with very few 3rd party apps. That makes Lite a far less appealing than 2nd gen.

Other 3G OBD adapters

It’s been a while since Pro was released. Automatic is no longer the only vendor of 3G OBD adapters. There are a few 3G adapters from other companies, Vyncs and VTPlug 3G. They’re being sold at Amazon for $69.99 and $59.99 respectively. They are around half price of Automatic Pro, but a drawback is that they charge an additional fee for faster GPS updates. Vyncs charges for an update rate of 60 sec ($30/yr), 30 sec ($80/yr), 15 sec ($129/yr) and 3 min by default. VTPlug 3G charges $12.99/$15.99/$20.99/$25.99 per month for updates every 120/60/30/15 seconds. When you take account of these recurring payments, they are very expensive.

Conclusion

Automatic Pro provides real-time tracking on any devices installed the app. Even if someone else drives your car, you can monitor where the car is driving thanks to 3G network chip. It’s a great advantage for those who share one car with many people like all member of a family using a single car or multiple workers using a company car. On the other hand, other three Automatic adapters without a 3G chip, all drivers need to bring their smartphones in a car. And they also need to install an app on their smartphones and use the same account. However, if you are a sole driver of your vehicle, you usually carry your smartphone, and an area you drive has good cellular reception, you may want to choose 2nd gen because it’s available eBay with a great discount since a Pro’s release. Click here to see the latest price of Automatic Pro.

Create your own NFC tags with smartphone apps

NFC stands for Near Field Communication. The technology is not only used for mobile payment such as Android Pay and Apple Pay or exchanging photos and contacts between two mobile devices, but you can make a set of tasks on your device and have it remembered by a piece of sticker called NFC tag. A tag is available online for less than a dollar. It contains a chip and doesn’t have a power source. When an NFC-support device, such as a smartphone is close (usually, a back of smartphone faces to a tag within an inch or so), a tag takes a small amount of power from smartphone and send back whatever information it stores.

NFC Tools Pro Edition

NFC Tools is a basic app for managing NFC tags. With the apps, various tasks can be written on tags such as changing smartphones settings, making a phone call, playing music, etc. You can add multiple tasks to a single tag so tags would be unique, creative and useful. For example, a NFC tag in my car goes like this;
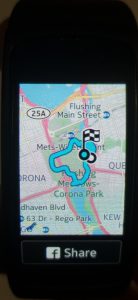
  • Disable Wifi
  • Enable Bluetooth
  • Play Google Music
  • Brightness mode to Automatic
  • Launch Google Map

An order of tasks are sometimes important, and you can freely change it in the apps. The tag in my car executes ‘Launch Google Map’ last, and Google Maps remains open. So, I can see the traffic or type the destination right away. NFC Tools is free, but some useful tasks are available only in NFC Tools Pro Edition ($3.49, for Android only)

Some apps provide even more creative way of using NFC tags. Here are some apps.

InstaWifi

When you invite your friend and let them use your Wi-Fi network, you have to tell them a password. However, InstaWifi allows you to let them connect to your Wi-Fi without giving up the password. After writing NFC tags, all you have to do is to tell your friends to tap the tag with their devices. The devices must support NFC technology, but InstaWifi has an option to create QR code instead of NFC tag. InstaWifi is free (for Android only.)

Sleep as Android

Sleep as Android is the app for tracking your sleep with smartphone’s sensors and setting the alarm with variety features. One of the features called CAPTCHA keeps you from oversleeping. After writing a tag and setting it up, you will have to tap the tag to stop the alarm. Stick a tag somewhere far from your bed, say bathroom. After stopping an alarm, just wash your face and your day will start without wasting any minutes. CAPTCHA has many other options like Simple math, QR Code, etc. And a sleep tracking data would be useful and helpful to improve your sleep. Sleep as Android costs $3.99, and it’s free to try for two weeks (for Android only.)

all 4 hue (for Philips Hue)

all 4 hue is the app for advanced controlling and configuring Philips Hue lighting system. What the app does with NFC tags is to make the tags remember ‘scenes’ so you can activate ‘scenes’ by tapping the tags. A free version of the app allows you to use all the features with some restrictions. It costs $4.49 to remove all restrictions (available for Android and iOS.)

See also: all 4 hue (for Philips Hue) review

Summary

Many other apps support NFC technology. Try exploring features of apps you use often, and you may find NFC supports in some apps. NFC technology is also available for recent smartwatches like Apple Watch and Sony SmartWatch 3. You can make a payment with a tap of your wrist. The technology is making your life easier and easier.


all 4 hue (for Philips Hue) review

all 4 hue is the app for configuring your Philips Hue lights. It provides one of the most comprehensive apps for Philips Hue lighting system. The app is available for Android and iOS devices. You can install the app on iOS and Android devices for free and use them with some limitations such as limited numbers of scenes you can create or limited time you can use special effects. But free versions give you access to all features so you can thoroughly evaluate the app before you purchase. Full versions cost $3.99 for iOS and $4.49 for Android.

About iOS version of all 4 hue

Android and iOS version of the app are not completely the same. There are some differences. iOS version lacks a few features. What is missing is Device Events and Effects. These features are very useful or entertaining. I paid $3.99 for the full version with a hope of adding these features which you can see in a free app for Android. But these features aren’t available for iOS devices whether it’s the free version or the full version. I just don’t know why iOS version lacks these features.

There are many features in the app. Here are some useful features that the original Philips Hue app doesn’t have. Please note that these are not all.

Toggle color loop

To start and stop color loop, open Menu > Lights > Edit (right icon) > Toggle color loop. You can apply this effect individually to any Hue color light bulb. Speed and colors are pre-set and not configurable. But you can adjust speed and colors of color loop under Effects.

Copy to NFC tag

You can copy scenes to NFC tags. After you create scenes, open Menu > Details > Edit (right icon) > Copy to NFC tag. Then put NFC tag on the back of your mobile device. Your device must support NFC (Near Field Communication) to program NFC tags. The full version of the app can create as many scenes as you want. And you can also make as many NFC tags as you want.

Device Events

You can make a light or a group of lights flash on an incoming call, SMS, or even app’s notification. You can select apps which notification you want to know with a flash. Connecting or disconnecting Wifi are also used as a trigger for the flash. For Wifi events, you may choose “Activate scene” in addition to flash.

Effects

As of writing this post, there are three effects available. You can start, stop and configure each effect. “Disco” uses your device’s microphone. Place your device near a speaker or play music on the device itself and lights start changing colors along with the music. “Color loop” is configurable on speed and colors. “Bonfire” provides an atmosphere of bonfire or candle with flickering lights. You can change colors and adjust several parameters.

Alarms, Timers, and Rules

You can set alarms, timers and make Rules. Rules consist of Conditions and Actions. Actions will be executed when Conditions are triggered. You can configure all accessories here like Dimmer Switch, Tap, and Motion sensor. Actions are not only turning on/off or activating scene but also flash, color loop, change brightness, start a timer, etc.

Rules with Dimmer Switch

I found it very handy to make Rules with Dimmer Switch. With the original Philips Hue app, you can make a dimmer switch remember five scenes on ON button, and the other buttons are not configurable. But all 4 hue app can completely reprogram the switch. For example, by default, Dimmer switch’s dim up/down buttons are set to change brightness 11% when it’s pressed, 21% when held down. Change the setting to 5% when held down and lights brighten or dim more slowly.
Plus, you can add multiple Actions in one Rule, which means that only one condition like pressing “ON” button triggers many Actions like turning on Relax in dining, Energize in Living room and turning off in Kitchen at the same time.

What’s more? There are more Conditions than it appears. Dimmer Switch has four buttons, and you can configure only ON button with the original Philips Hue app. But you can completely reprogram the switch with all 4 hue app. If you want to do it the following Conditions can be used in Rules:

Button ‘On pressed

Button ‘Dim up’ pressed

Button ‘Dim down’ pressed

Button ‘Off’ pressed

Button ‘On’ hold

Button ‘On’ short released

Button ‘On’ long released

Button ‘Dim up’ hold

Button ‘Dim up’ short released

Button ‘Dim up’ long released

Button ‘Dim down’ hold

Button ‘Dim down’ short released

Button ‘Dim down’ long released

Button ‘Off’ hold

Button ‘Off’ short released

Button ‘Off’ long released

Let’s say you want to control the lights in the bedroom. But you want to control lights separately, lights on the ceiling and lights on the night table. Create two groups and name them “Bedroom” and “Night Table.”

Button ‘On or Off’ short released and long released are practically the same as Button ‘On or Off’ hold. So, don’t use them.

Rule 1: Button ‘On’ pressed triggers Enable ‘Bedroom’

Rule 2: Button ‘On’ hold triggers Enable ‘Night Table’, Disable ‘Bedroom’

Rule 3: Button ‘Off’ pressed triggers Disable ‘Bedroom’, Disable ‘Night Table’

Now, “ON” button can turn on two groups separately. If you set up five scenes with the original Philips Hue app, you can continue to use them. You may set up Dim up and down buttons for turning on and off lights in other rooms, but let’s keep dimming features for the bedroom. So, let’s make Rules to use dimming features in Bedroom and Night Table.

Rule 4: Button ‘Dim up’ pressed triggers Increase brightness by 11% in Bedroom, Increase brightness by 11% in Night Table

Rule 5: Button ‘Dim up’ hold triggers Increase brightness by 21% in Bedroom, Increase brightness by 21% in Night Table

Rule 6: Button ‘Dim down pressed triggers Decrease brightness by 11% in Bedroom, Decrease brightness by 11% in Night Table

Rule 7: Button ‘Dim down pressed triggers Decrease brightness by 21% in Bedroom, Decrease brightness by 21% in Night Table

Actions of increase or decrease brightness don’t affect lights when they are off. Now, you can brighten and dim the lights in the room. But, there is still one thing that the switch can’t do. It’s to turn on all lights in the room. It may not be necessary to turn on all lights in the room at the same time, but just in case, create the last Rule.

Rule 8: Button ‘Off’ hold triggers Enable Bedroom, Enable Night Table

Now, a single Dimmer Switch has a complete control of two groups of lights. Five scenes you might have set up in the original Philips Hue app can continue to be used. (scenes for only one room or group. Although you can add up to 2 rooms in Philips Hue app, if you do so, you can’t control them separately.) Please keep in mind that you shouldn’t change the setting of the dimmer switch in Philips Hue app after you create Rules. You will see the following message in Philips Hue app.

The current behavior for this button can’t be displayed. Configuring the On button will remove the current behavior.

If you configure, some Rules will be removed or changed.

Conclusion

Features introduced here in this post are not all. There are more things you can make Philip Hue lighting system convenient with the app. It’s definitely worth the price.

Download all 4 hue for Android devices

Download all 4 hue for iOS devices