Thinkware X500 Dash Cam Review

Design

Thinkware X500 is mounted on a windshield with a clear plastic bracket with adhesive. It has 2.7-inch LCD which lacks a touchscreen. The buttons on the back of the camera do everything such as changing the setting, navigate the menus, and review a recording. There is a power button on the side. The camera automatically turns on and off, but you can manually do so by pressing down the power button for about 3 seconds.
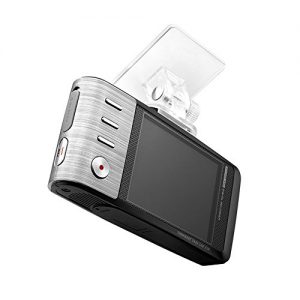
thinkware x500 backThere is a camera lens on the front, off to the right. So, you can place the camera lens in the center, but the whole device can be behind a rearview mirror to block your visibility as little as possible. A power and MicroUSB port for rear camera input are both on the top of the device.

Video Quality

Thinkware X500 offers 1080p (Full HD 1920X1080) on both front and optional rear camera. They have 140-degree wide viewing angle.

Memory Card

A memory card slot is located on the side, above the power button. X500 is compatible with 16GB, 32GB, and 64GB MicroSD card. It’s recommended that MicroSD card should be formatted every two weeks. Formatting memory cards erase all recordings, but the settings are kept

Five folders for five types of recordings

Recordings are categorized five different types and saved in 5 different folders in a memory card.

Continuousa name of folder “cont_rec” When the ignition is on, a dash cam automatically starts recording. All recordings are 1 minutes segments.

Incident Continuousa name of folder “evt_rec” When G-sensor detects an impact, the dash cam will store the recording of 10 seconds before and after the impact. (total 20-second recording) Please note that driving over speed bumps, manholes, etc can also be detected as an impact. Conversely, if the level of impact is smaller than the sensitivity of the G-sensor, the event won’t be treated as an incident. The sensitivity can be configured in the setting.

Parking Incidenta name of folder “parking_rec” When a dash cam detects an impact during parking mode, it will store the 10 seconds before and after the impact. (total 20-second recording)

Motion Detectiona name of folder “motion_rec” When a dash cam detects a motion during parking mode, it stores the recording of 10 seconds before and after the detection (total 20-second recording) Optional rear camera also has the motion sensor to initiate Motion Detection recordings.

Manual Recordinga name of folder “manual_rec” It allows you to save the recordings in the different folder manually, so the recordings are protected from overwriting. Pressing REC button saves the recording of 10 seconds before and 50 seconds after. (total 1-minute recording) It is a useful feature when you witness something such as an accident that you don’t directly involve or a rare phenomenon like lightening strike and meteor shower.

Safety Camera Alert

Thinkware X500 offers Safety Camera Alert which warns you by voice and displays on the LCD when red light cameras, speed cameras, etc. are nearby. For this alert system, the camera uses a built-in GPS and database that you need to download from the website and save on the memory card.

Advanced Driver Assistance Systems (ADAS)

ADAS has three different types of assistance systems. 1. Lane Departure Warning System (LDWS) 2. Forward Collision Warning System (FCWS) 3. Front Vehicle Departure Warning (FVDW) They warn you by a chime and displays on the LCD. These warning systems need calibration first. Driving at night and road surface conditions can affect the accuracy of ADAS. And they also use GPS to know the speed. So, interference with GPS signals such as a tunnel, weather conditions, or geographical features can also affect the accuracy of the systems.

How to Upgrading Firmware, Download Speed Cam Data

Visit www.thinkware.com and follow the instruction. You will need to download a file from the website and copy or unzip in the memory card you use for your dash cam. When the memory card contains the file, the dash cam will automatically upgrade firmware or speed cam data.

Thinkware Dash Cam PC Viewer

Thinkware also has software for Windows PC and Mac. In software, you can do whatever you can do with dash came, such as review or delete the recordings, and change the settings. But you can do them more easily on a larger screen of your computer. In addition to them, software can show you a map. Thanks to a built-in GPS, location and speed are always recorded along with the scene captured by the dash cam. You can see them all simultaneously in the software.

Conclusion

Thinkware X500 has Full HD camera, and an optional rear camera has the same video quality. Unless you want to capture scenic roads on your trips, 64GB memory card and 140-degree viewing angle would be enough. Though the front cam has 2.7-inch LCD, it’s compact and small, but a half of case on the front is somehow silver. So, it’s less discreet. Parking mode works great. It’s triggered by motion and impact. You can configure the sensitivity or turn them off. Please note that you will need it hardwired for Parking mode and the hardwired kit is sold separately. The alerts system is helpful. Overall, Thinkware X500 is a great dash cam for a security purpose.

Related Post


How does a parking surveillance by dash cam work?

Dash cams are useful gadgets for a security purpose. When you get a car accident, a recording can be evidence. It may help an insurance company determine which one of you is at fault. Accidents happen not only on the road but in a parking lot when you are not in a car. Dash cams work as parking surveillance when you park your car. There are different types of parking mode. And you usually need to buy an extra device as a power supply for parking mode to work. That’s because there is no power supply from a cigarette lighter socket when the ignition is off. This post explains the details of parking surveillance of dash cam.

How does a dash cam get power when the ignition is off

Most dash cams get power from a cigarette lighter socket. While you are driving, the socket provides more than 12V, which is enough for dash cams to operate. You never have to worry about the power as long as you are driving. However, when you park your car, dash cam shuts off because a cigarette lighter socket has no power when the ignition is off. To your dash cam work when the ignition is off, you will need to connect a dash cam to a constant power. Here are two types of solution.

MotoPark Multi Safer Low Voltage CUT OFF Hard Wire Power Supply BDP KIT

MotoPark Multi Safer Low Voltage CUT OFF Hard Wire Power Supply BDP KIT

Hardwiring Kit with Battery Discharge Prevention (BDP) device – Find two terminals in an interior fuse box. One has constant battery voltage (e.g., power seat, dome light), and the other for a cigarette lighter socket. Connect two wires each terminal. A device in the middle of the wires is BDP. BDP device monitors the voltage of vehicle’s battery and shuts off when the voltage gets low. So a car’s battery won’t be dead even after you park for a long time. For most hardwiring kits with BDP have a fixed voltage of 11.6 as a shut-off voltage, some sophisticated ones can be configurable and also set a timer.

THINKWARE TWA-SH Hardwiring Cable for THINKWARE Dash Cams

THINKWARE TWA-SH Hardwiring Cable for THINKWARE Dash Cams

You may use any manufacturers hardwiring kit with BDP as long as the connector fits your dash cam. So, if the connector of a hardwiring kit is a cigarette lighter socket, it fits any brands of dash cam. But, keep in mind that some dash cams have built-in BDP. One of dash cam brands, Thinkware sell a hardwiring kit separately for their dash cams X500 and F770. The kit consists of wires with inline fuses and no BDP because dash cams already have it. So, it’s always important to refer to instruction manual of your dash came before you buy a hardwiring kit.

See Also: Thinkware X500 Dash Cam ReviewThinkware F770 Dash Cam Review

External Battery Pack – It’s a small rechargeable battery for small electrical devices. It gets charging from a cigarette lighter socket while you are driving. This item, Blackvue B-112, offer fast charging and long hours operation. According to the company, it takes an hour to charge fully and provide 12 hours of power supply. The shape of its outlet is a cigarette lighter socket so that it can be used for other brands of dash cams. It also has two USB outlets for other electric devices. Usually, external battery packs are more expensive than hardwiring kits.

Three Types of Parking Mode


Basic Parking Mode – Either G-sensor or motion sensor wakes up a dash cam and gets it to start recording. This type saves a lot of battery power than other two types below. A big drawback is that it takes a while for the recording to begin after the sensor detects an event. So, it may be too late to capture an important scene like a license plate of car which damaged your car.

Buffered Parking Mode – In this mode, a dash cam continuously records. The recording is not stored in a memory card but internal memory. The internal memory is very limited. When nothing happens (no events detected by sensors), a dash cam overwrites the internal memory over and over. However, when sensors detect an event, a dash cam automatically stores the recording in a memory card. It’s not only after the event but also before the event (typically 5 to 10 seconds). And when you get back to your car, many dash cams with this parking mode notify you by LED, chime, or speaking that the events had occurred.

Time Lapse Parking Mode – A dash cam with Time Lapse shoots a picture every second so you can roughly see what happened when you are not in a car. Like basic parking mode, it may not be able to capture an important scene. For example, you park on curb, and someone’s car hit a side mirror of your car. If the other car was driving very fast, a picture of time lapse parking mode might not show the license plate of the car. Some dash cams automatically switch to a normal recording when sensors detect an event.

Summary

Having a dash cam with parking surveillance feature is good security against hit n’ run or vandalism incident. Most middle to premium dash cam has decent feature of parking surveillance. Buffered parking mode is the most reliable. Keep in mind that you will need either a hardwire kit or external battery pack to have your dash cam perform in parking mode. And they are usually sold separately.

Related Post: How to choose the best Dash Cam for your car

How to choose the best Dash Cam for your car

Rexing V1 / 2.4″ LCD / 1080p / G-Sensor / Loop Recording

If you have never had and looked for a dash cam before, you will be surprised that there are so many dash cam’s brands, models, types, features, and prices. Besides, unlike digital cameras or DVRs, most manufacturers of dash cams are small and little-known. But, when you become familiar with the features of dash cam and know what features you need, it’s a lot easier to find the best dash cam for you. Here are the key features of dash cam you may be interested.

Single or Dual Channel

Rexing V1 with Waterproof Rear Camera / 2.4″ LCD / 1080p (640×480 on rear) / G-Sensor / Loop Recording

The first thing you should determine whether you need a single channel dash cam to record only in front through a windshield or a dual channel for both front and rear. While a majority of front cameras is mounted on a windshield, rear cameras can be mounted either on the rear window or outside of your car for vehicles that don’t have a rear window. In case you need to mount a rear camera outside, you should consider the quality of waterproofness in the rear camera.

Mount on a windshield or rear view mirror

falcon zero f360 rear view dash cam

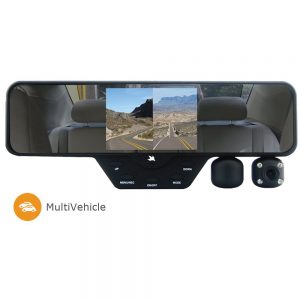
Falcon Zero F360 / Dual Camera with LEDs /3.5″ LCD

Front dash cams do not only mount on a windshield with a suction cup or adhesive tape but also clamp over an existing rear view mirror. This type of dash cam consists of camera, display, and mirror. Although it completely covers up an existing rear view mirror, it acts as a rear view mirror and a display of the camera. They are normally bigger and wider than an existing rear view mirror. And a lens is located on its side or bottom so it can see outside through a windshield. It’s very easy to mount, or detach and mount on other vehicles. A drawback is that a rear view mirror is bigger than an existing one for sure. So, it sacrifices your visibility more or less. And, if your current mirror has some features like compass, temperature, 2880 x 2160p dimming, you can’t use them anymore.

HD, Full HD, or Ultra HD

image of r2-4k dash cam

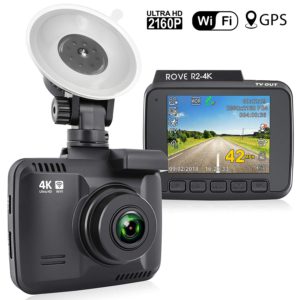
Rove R2-4K Dash Cam Built in WiFi GPS Car Dashboard Camera Recorder with UHD 2160P, 2.4″ LCD, 150° Wide Angle, WDR, Night Vision

Over the years, the video quality of dash cam is improving. While early dash cam offered 720p (1280×720 pixels, aka HD) or less, a standard of recent dash cams is at least 1080p (1920×1080 pixels, aka Full HD.) But it’s normal that dual channel dash cam provides different resolution between a front and rear (e.g. 1080p on a front and 720p on a rear.)

2160p (2880 x 2160 pixels, aka Ultra HD) is the highest video resolution available today. If you want a dash cam for not only a security purpose but also capturing scenic road and view on your trip, The highest resolution may be the main factor when you choose the best dash cam for you. And there is wide-screen in the market of dash cam, too. 2560×1080 is an aspect ratio of 64:27 instead of 16:9. It offers a cinematic capture with additional focus on the surroundings to the left and right.

Night Vision

KDLINKS X1 / 2.7″ LCD / 1080p / GPS / G-Sensor / WDR Superior Night Mode

Night vision is the feature of cameras that is capable of capturing in dark environment. The feature is not very important on dash cams because headlights or street lights are bright enough to capture the surroundings. However, if you mainly drive at night in a very dark environment or park your car where there is barely street light, Night vision may be an important factor.


Loop Recording

With this feature, a dash cam doesn’t just stop recording when a storage of a memory card gets full. Instead, it automatically overwrites the oldest file, so you don’t have to worry about running out of storage. When something happens, such as an accident and hit&run, you pull out a memory card and copy the file to other media or mark the file as important so that it won’t be overwritten by Loop Recording. For some dash cams having G-sensor, files are automatically stored in a separate folder whenever it detects an impact. Almost all dash cams have the feature of Loop Recording.

G-sensor

G-sensor is a built-in sensor in cash cam that detects an event involving force, impact, shock, such as accident and hit&run. For most dash cams, the files containing these events are automatically stored in a separate folder so that they won’t be overwritten by Loop Recording feature. When you park your car, most dash cams are off. When it detects the events, G-sensor turns on dash cam and make it start recording.

Buffered Parking Mode

THINKWARE X500 / 2.7″ LCD / 1080p / GPS / G-Sensor / Motion Sensor / Warning System / Buffered Parking Mode

When someone damages your car in your absence, a parking mode with G-sensor alone may capture a license plate of a car that hit your car. However, it’s not always successful. Since it needs some time to turn on and start recording, It may be too late to capture a scene that can be used as evidence. And, most importantly, a recording is always afterward of the events.

With a buffered parking mode, a dash cam continuously records when you park. But, it won’t be saved in a memory card unless G-sensor or Motion sensor detects the events. Not only can you see the record of afterward footage, but also the footage before the detection. (typically 5 to 10 seconds before)

Please note that almost all dash cam with the feature of parking surveillance needs a hardwiring cable that always connects vehicle’s battery power. The cable has a voltage meter to monitor a battery level. When a battery voltage drops below a certain level, the cable automatically shuts off a dash cam to stop further battery discharge.

See also: How does a parking surveillance by dash cam work?

GPS

Dash cam with GPS can keep track of your vehicles’ location and speed. Later, when you see the footage on PC, you also see a map showing where you drove and speed in a video. GPS antenna is either built in the dash cam or connected externally by a cable.

Navigation

Magellan RoadMate 6230-LMX / 5″ touch screen LCD / 720p / G-Sensor / GPS / Warning System / Navigation / Free Lifetime Map Updates

Dash cam with Navigation means just as it sounds. A display of dash cam can show a map, location, turn by turn navigation. It’s the perfect solution for those who need both of Navigation and Dash Cam and don’t want to put multiple devices on the windshield. The drawback is that you certainly mount it on a windshield and sacrifice the space and your vision more or less. Since currently, available dash cams with navigation are all-in-one units, they have to be placed on the center of the windshield. And you can’t mount them behind a rear view mirror because you need to see a map.

Wi-Fi

BlackVue DR650S-2CH / Dual Channel / 1080p front / 720p rear / Wi-Fi / G-Sensor / Motion Sensor / Buffered Parking Mode / Loop Recording / GPS

Wi-Fi enabled dash cams connects to your smartphone. You can see real-time and recorded footage on your smartphone without removing a memory card. So, there is no risk that you forget to put back a memory card after a backup. And dash cam no longer needs a display. It can get smaller and more discreet.

Conclusion

There are key features of dash cam you may be interested. And they will help you find the best dash cam for you.

5 Popular Bluetooth OBD2 Adapter Comparison

Read Also

OBD stands for Onboard Diagnostic. OBDII is a system standardized for cars and light trucks manufactured in the United States in 1996 or later. Vehicle’s computer monitors emission system. When it detects a problem, it notifies a driver by illuminating Check Engine Light. All OBDII compliant vehicles have the same shape of connector called DLC (Data Link Connector) typically under the dash. The DLC is connected to vehicle’s computer. Auto Mechanics hook up OBD scan tools with DLC to find out the problem.

A decade ago, scan tools were very expensive and only for mechanic shop owners. But, now thanks to the advent of technology, you can use your smartphone as a sophissticated scan tool. All you need are a small adapter and mobile app.

There are many brands, and they have different prices and features. But, things in common are they all connect to your smartphone via Bluetooth and work with an app installed on the smartphone. And here are typical features of Bluetooth OBD2 adapters.

  • Read / Clear trouble codes – Vehicle’s computer can detect emission related problems and stores trouble codes when it happens. You can retrieve the codes with a short description. It helps you identify a cause of the problem. You can also clear codes and turn off Check Engine Light. Please note that majority of adapters and apps can retrieve only generic and manufacturer specific codes (Powertrain, Pxxxx).
  • Freeze Frame Data – It’s a snapshot of sensors readings when a problem occurs. It helps you identify a cause of the problem which happens in a particular situation.
  • I/M Readiness – Vehicle’s computer performs self-tests on some components. It takes a while to complete all tests. You can see each of them “Ready” or “Not Ready.” It won’t pass a state inspection if one or more tests are “Not Ready” (depending on the states.)
  • Live Data – You can see real-time readings of supported sensors. Supported sensors vary from vehicles to vehicles. In general, newer cars are capable of showing more readings.

Here are popular Bluetooth OBD2 adapters.

BAFX Products ($22)

BAFX Scan Tool is a long and best seller at amazon.com. It’s much bigger than other adapters. Its features are basic but compatible with many OBD apps like Torque, DashCommand, etc. And a company offers a two-year warranty and a great customer support. Unlike the other adapters listed in this post, BAFX is ROM (read only memory.) There is no firmware update. And it won’t work with iOS devices. You may see the same app in both Google Play Store and Apple Appstore such as DashCommand. BAFX works with DashCommand on Android but not with one on iOS devices. That’s because the hardware has not gone through the Apple certification process. So, it doesn’t work with any apps on iOS devices at all.

BlueDriver ($100)

BlueDriver scan tool exclusively works with BlueDriver app. The app is available at Google Play Store and Apple Appstore (works with both Android and iOS devices.) A company, Lemur Vehicle Monitors, is very serious about vehicle diagnostic capability with their product. It offers several features that no other adapters do.

  • Enhanced codes – Not only can you retrieve Pxxxx codes, but also Bxxxx, Cxxxx, Uxxxx for ABS, SRS, and transmission on GM, Ford, Chrysler, Toyota, BMW, Mini and more in the future. The company is always working on adding the feature to more manufacturers.
  • Mode 6 – Mode 6 is an advanced test result. (e.g. misfire counts) It’s useful when you diagnose intermittent problems that don’t generate trouble codes.
  • Repair Reports – You can have access to repair reports generated on each trouble code for free. It contains possible causes, top or frequently reported fixes. Of course, you can get the same information by searching on the internet for yourself, but the reports are neat, and you can get them faster and easier. Currently, this feature is only available to users in the U.S. and Canada.

OBDLink MX ($80)

OBDLink MX has a small design. It provides faster screen updates on the apps. It works with an original app, OBDLink on Android, OBDwiz on Windows PC, and many 3rd party apps on Android. It’s not compatible with iOS devices. For supported GM models, you can open windows, door locks with an Android app, obdCANex. With enhanced PC diagnostic software, ScanXL, you can access to ABS, SRS, and transmission systems. It supports GM’s SW-CAN and Ford’s MS-CAN in addition to the five standard OBD2 protocols. If your vehicle doesn’t use SW-CAN or MS-CAN protocol, you may choose OBDLink LX ($50).

Automatic Pro ($130)

Unlike other OBD adapters, Automatic Pro is focused on vehicle tracking and trip logging. Once you set up in the Automatic app, it starts logging automatically. The adapter has a built-in 3G chip. So, the adapter can directly connect to 3G network without a smartphone. All records are stored in the cloud. With an account ID and password, you can access them on any devices from anywhere. It means you can track your car someone else is driving from your PC at home. The adapter is also a Bluetooth device. When it’s connected to your smartphone, you can read and clear trouble codes, enable Clash Alert, or use selected 3rd party apps. It also works with Amazon Alexa, IFTTT, Nest, Stringify, etc. It’s compatible with both Android and iOS devices. (See Also: Automatic Pro Car Adapter Review)

Kiwi 3 ($100)

Kiwi 3 is the third generation of OBD adapter made by PLX Devices. A small and stubby adapter would never bother your driving wherever your car’s DLC was. And it’s one of few Bluetooth OBD adapters which works on both Android and iOS devices. It’s compatible with many 3rd party apps. It provides faster screen update. Except for that, it offers nothing special. The company is currently developing the original mobile app, Kiwi 6-in-1 OBDII App. You can see a demo here. It looks cool, but $40 is too expensive for a mobile app.

Conclusion

BAFX is a good entry level. But BAFX is not compatible with iOS devices. BlueDriver is specialized for vehicle diagnostics. BlueDriver is compatible with both Android and iOS. But it works exclusively with BlueDriver’s app. Currently, it can access to enhanced codes on GM, Ford, Chrysler, Toyota, BMW, and Mini. OBDLink MX is very versatile. Not only is it compatible with regular OBD apps, but also obdCANex for remote-controlling GM vehicles and Scan XL- professional diagnostic software on Windows PC. OBDLink MX is not compatible with iOS devices. Automatic Pro features an automatic vehicle tracking and trip logging by using a built-in 3G chip. It also works with Amazon Alexa, IFTTT and connects to your smartphone via Bluetooth to use 3rd party apps such as OBD Fusion. Automatic Pro is compatible with both Android and iOS devices. Kiwi 3 is the smallest of all and as fast as OBDLink MX. Except for a compatibility with both Android and iOS devices, there is nothing special.

Tile – the best Bluetooth key finder and comparison

Today, there are many brands of Bluetooth-enabled key finders on the market. Tile Mate ($25) and Tile Slim ($30) are the latest and most popular of all. Let’s see their features and comparison to other brands.

Basic

Tile Mate is a key, phone, or anything finder. It works with a mobile app, Tile app available at Google Play Store and Apple Appstore. Tile is connected to your mobile device via Bluetooth, and the app helps you find your item with various features. The size of Mate is 1.34″ x 1.34″ x 0.18, and it has a hole to loop a key chain. For a wallet, purse, or bag, you may want to choose Tile Slim. The size of Slim is 2.13″ x 2.13″ x 0.09. It’s as thin as two credit cards. It slides into a pocket and wallet or attaches to a tablet and laptop by using adhesive pads (sold separately.) Both Tile Mate and Slim have an IP5 rating. It means that it’s OK with splash water, rain, or a drink spill, but not with submersion.

Ringtone

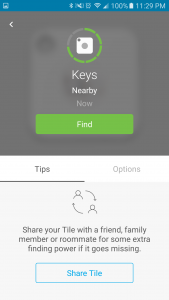
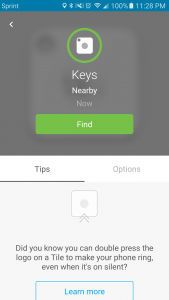
In the app, choose your item and tap Find, and your Tile will ring. You can choose a sound from several different ringtones. According to Tile website, Tile Mate rings at 88 dB, and Slim at 82 dB. There is no volume adjustment. You can use some other features described below to try locating the item, but in the end, you will rely on the ringtone from Tile to find your item.

Proximity Sensor

You can also use a proximity sensor to locate your item. Tapping the Tile icon enables the proximity sensor. But the sensor is not that accurate. When Tile is placed right next to my smartphone, bars of proximity sensor are constantly changing.

Map

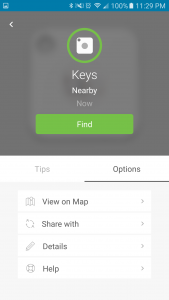
You can see a map with a location of your item. A green circle on a map represents a location of your item, but the circle is roughly as big as 100 ft on a map. It doesn’t show a precise location. However, the map is useful when Tile is out of range. The app automatically records the last location when and where Tile got out of range. So, you will know where to look first.

Notify when found

When your item isn’t in a place on a map, it may be missing. In this case, you can use a “Notify when found” button. If any Tile users come close to your item, you will receive an anonymous notification with a map. Any Tile users mean that anyone who has a smartphone and Tile app is running in the background. So, it’s recommended to ask your friends, family, and other people you know to install the app. It will build a larger network around you.

Find your phone

The app can make Tile ring. Conversely, Tile can make your phone ring. When you can’t find your phone connected to Tile, double-press the button, and your phone will ring even on silent. But Tile has to be in a Bluetooth range, and the app has to be running in the background.

Find your phone that is out of range

When your phone is out of range, you can use Tile app on other mobile devices or Tile’s website to find your phone. Click Connect and Find, and your phone will ring. Please note that this method doesn’t require the app to be running in the background. As long as your missing phone is on and connected to the internet in any ways (3G, 4G, or Wi-Fi), the phone will ring. You can also see a map. With Lost Mode features, you can send a message as a notification to your missing phone so anyone can see it even when the phone is locked.

This feature is free. It means you don’t even need to have Tile hardware. All you need is to install the free Tile app, create your account, and log in with the same account on all your devices.

reTile, Renewal Program

A battery of Tile is not replaceable. A company offers a replacement program called reTile. The company guarantees that a battery lasts at least one year. When it passes almost a year since the activation, you will receive a notification with an option to exchange your Tile with the new one for 50% of the original price.

An advantage of this program is that you will get the latest version of Tile for a half price. If the company release a new version, you will get the new version. A disadvantage is that you will have to pay a half of the original price. It may be more expensive in the future. Or, if you buy Tile with a discount, the discount doesn’t reflect on the price of the reTile program.

How long does a battery of Tile actually last?

Before Tile is activated, it is in a sleep mode. The sleep mode preserves much more battery than when activated. But you shouldn’t keep Tiles unactivated for a long time because a battery is discharging more or less regardless of its state, and a warranty covers for a year from the date of delivery (by authorized retailers.)

And, how long will it last? It depends on how you use it. If you ring it a lot, it will be a short life. But, because the company offers a one-year warranty, it must have enough margin. And with a period and price of the reTile program considered, It might last for two years but not for three years. (it’s just my speculation.)

What about other brands? What’s missing on Tile

There are many brands of Bluetooth key finders today. I believe that Tile is the best, most reliable, and most popular of all. But what about other brands with a feature which Tile doesn’t have. Here are some features Tile is missing.

Separation Alert

Tile doesn’t have a separation alert. A separation alert is a feature that is available on some other brands of Bluetooth trackers, like TrackR Bravo and Chipolo Plus. It notifies you when your item gets out of Bluetooth range. In my opinion, the feature is not that important. A primary purpose of Bluetooth finders is to find misplaced items quickly, not keep your items around your smartphone. It is normal that, in a house, your keys sit in one place and you carry around your smartphone. And reportedly, the feature is sometimes annoying, unreliable, and it may cause a short battery life.

Ring your phone even when the app is closed

When the Tile app is closed (not running in the background), Tile can’t ring your phone. Pebblebee Honey can ring your phone even when the app is closed. However, as I mentioned above, you can make your phone ring with other mobile device or the Tile website from a computer.

Works with Alexa

TrackR has an Alexa Skill to work with Amazon Alexa. “Alexa, ask TrackR to find my phone” will ring your phone. Unfortunately, that’s all it can do. You can’t have Alexa ring a TrackR hardware. Besides, there have already been some similar Alexa Skills like “Find Phone” and “Where’sMyPhone”. TrackR skill may be better because it makes it sound even on silent. But, to use the skill, you don’t even need a TrackR hardware. All you need is to install an app and enable the skill. Recently, Pebblebee integrated their app into Amazon Alexa. Unlike TrackR, not only a phone but Pebblebee’s Skill can also ring their hardware with Alexa.

Conclusion

Tile Mate and Tile Slim are the most reliable Bluetooth finders on the market today. Thus, they are the most popular, and there are more users than any other brands. A “Notify when found” feature is a common feature in most Bluetooth key finders, and it relies on the network which is built by people who use the same brand hardware and app. So, Tile is reasonably the best choice of all.

The Wireless Smart Button, Integrate Flic into your life

Flic Smart Button ($35) is a Bluetooth-enabled rubber-coated round button. It connects to your smartphone or tablet via Bluetooth. When you press it, that activates actions you have set up in Flic app on your mobile device. The app is available at Google Play Store and Apple Appstore.

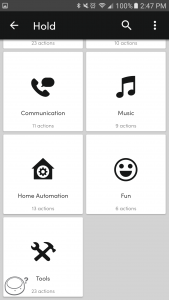
Each button can remember up to 3 different functions in the app. And there is no limit to how many actions you can add to each function. The app can tell which function to trigger from how you press the button (single click, double click, hold.) Flic is an IP44 rating. It’s fine with a splash water but not with a submersion.

Design

You can stick Flic to any surface by using a double-sided adhesive sheet. The sheet is reusable. Washing and drying recover its stickiness so you can put it many times to change places and find the best position. For outdoor use, a battery cover of Flic can be exchanged to one with a clip so you can attach it to your pocket, belt, bag, etc. All these things are included, and battery as well.

Difference between Android and iOS apps with Flic

When Filc app is open on your device, all actions can be triggered. When Flic app is running in the background, most actions can be triggered. But depending on actions, iOS devices may need you to tap a notification first. On Android devices, most actions can be triggered even when the app is closed. But, on iOS devices, any actions can’t be triggered when the app is closed. So, when you restart your iOS device, you need to open the app to use Flic.

Settings are saved in your account

The information and settings are saved in your account so you can switch mobile devices and keep using the same Flic button on a new device without re-creating actions and stuff. Please note that the apps on Android and iOS are different. Even if you use the same email address and password, the settings you have made on Android devices won’t show up in iOS devices, or vice versa

Delay setting

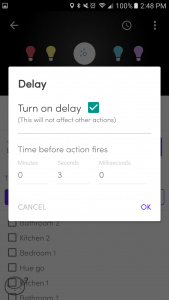
Flic Android app Delay setting

Tap a clock-icon > Check “Turn on delay” > set time > OK

For Android users, you can set up a delay on each action. With this setting, you can make Philips Hue light bulbs in a hallway turn on one by one, starting from an entrance to an end. Conversely, when you turn off, lights turn off from the end to the entrance. This is just an example. Possibilities are endless. Unfortunately, this feature is not available on iOS devices at the time of writing.

IFTTT

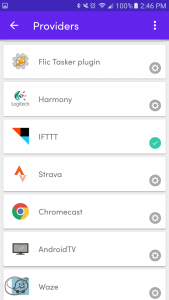
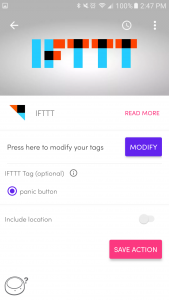
Flic is compatible with IFTTT. You can use Flic only as a trigger of IFTTT’s Applets. You need to choose your Flic button by name and Click Type in Click, Double Click, Hold, or Any. Then you set up actions and complete an Applet. However, only creating Applet doesn’t work alone. To get Applet to work, you need to add IFTTT action in Flic app. For example, you make an Applet, “When you press and hold, activate a siren of SmartThings alerting device.” Then, you will need to add IFTTT action to Hold section in Flic app.

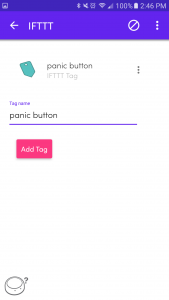
For Android users, a Tag feature for IFTTT is available. It’s useful if you have many Filc buttons. Let’s say you have four Flic buttons. Instead of making four Applets that has the same actions, you just need to make only one Applet like “When you use Flic with a Tag, activate a siren of SmartThings device.” After that, all you need to do is to add an IFTTT-Tag action in Flic app. You can add it to any buttons and any click types. At the time of writing this post, this feature is not available on iOS devices.

Share Flic Smart button?

You can share Flic to others. Though Flic can connect only one device at a time, it can remember multiple mobile devices. When one device is not in range, Flic connects to the other device that was previously paired. And it works with the app on the second device and triggers different actions from ones in the first app.

For example, you share a desk with your co-worker in an office. You put one Flic on the back of the desk. You guys share the desk but never work on the same shift. During your shift, Flic is connected to your smartphone, and it triggers actions you set up in the app on your smartphone. After you finish to work and go home, your co-worker comes to the office. The same Flic button automatically connects to the co-worker’s smartphone and works with the app on his or her smartphone during his or her shift. It doesn’t matter that accounts, actions, apps, devices are different. Flic is just a button. It only sends a signal to a connected device. The app on the connected device will do the rest.

Advantage and disadvantage over an NFC-tag

NFC-tags costs a fraction of Flic. It may be as little as $1 each. As Flic, you can set up multiple actions on a single tag. But most of actions are limited to functions of mobile devices such as turning on/off Wi-Fi, changing brightness setting. Though it can launch any app installed on the device, it may not be able to do any further. For example, you can setup an NFC tag to open WeMo app on your smartphone. But, that’s all. The tag can’t switch on/off WeMo devices.

However, the biggest advantage of Flic over an NFC-tag is quickness and easiness. To scan an NFC-tag, you must unlock your device and place it over a tag. All you need to get Flic to work is a simple press of a button without a need of unlocking your device. It is more casual and fitted to your everyday life.

See Also: Create your own NFC tags with smartphone apps

Conclusion

Flic smart button is a very useful gadget. It’s well-designed. A reusable adhesive sheet allows you to try placing it in many different locations. You can even wear Flic by using a battery cover with a clip. Three functions, Click, Double-Click, and Hold, triggers an action or a set of actions in various apps. There is no limit of actions you can add to each function. With IFTTT, you can use Flic in even more creative ways.

What is WeMo Maker?

Belkin Wemo Maker ($80) can control low-voltage devices such as blinds, sprinklers, irrigation system, pool pump, powered gates, etc. It connects to your home Wi-Fi network, and you can monitor and control a device from anywhere as long as your home Wi-Fi has an internet connection. As other Wemo products, you can make a schedule, set a timer, get a notification in Wemo app.

Design

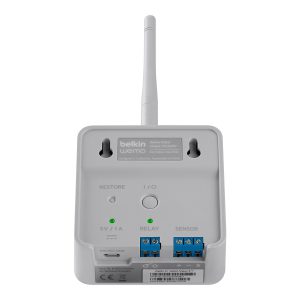
Wemo Maker is a 3″ square box with a Wi-Fi antenna on the top. On the front, there is a physical on/off switch and LED indicator. On the back, it has an on/off button for Wemo Maker, a reset button, relay terminals for a low-voltage device or a switch circuit of a high-voltage device, sensor terminals for a sensor, and a micro-USB port for power.

Relay Terminals Specs

wemo maker on the backYou can connect your low-voltage device directly or a circuit of switch or relay of a high voltage electric device to two Relay terminals. Either way, it must be within 24VAC 1A or 12VDC 2A.

Two control functions, Momentary or Toggle

Depending on your application of Wemo Maker, you need to choose a setting between Momentary and Toggle. Toggle means that when you press on, Wemo Maker turns on and stays on until you press off. If you hook up your low-volage device directly to Wemo Maker, you probably choose this setting. Momentary means that when you press on, Wemo Maker turns on momentarily. A duration of a momentary function is 300 milliseconds. If Wemo Maker connects to a switch circuit of the main unit like garage door opener and sprinkler, you probably choose this setting. However, some people report that 300 milliseconds is not long enough to activate the main unit. If that’s the case, choose a toggle setting. And you have to turn on then off manually. You can also create IFTTT applet using action “Turn relay on then off” to make it work the same thing, but the applet may work with a significant delay.

Sensor Terminals Specs

You can connect a sensor to Sensor terminals of Wemo Maker. Sensors must work within 5VDC 100mA.

Using Sensor as a trigger or monitor

You can configure and use it as a trigger of Wemo Maker or a monitor of the status. For example, when you put a magnetic switch on a garage door, one part is on a rail, and the other is on the door. If you put them close to each other when the door is fully closed, you can tell if the door is fully closed or not. If you put them when the door is fully open, you can tell if the door is fully open or not.

IFTTT

Wemo Maker works with IFTTT. But, It may work with a delay depending which triggers or actions you use for an applet. Here is a list of Wemo Maker’s triggers and actions.

Triggers

  • Relay on
  • Relay off
  • Momentary on
  • Sensor triggered
  • Sensor not triggered

Actions

  • Turn relay on
  • Turn relay off
  • Toggle relay
  • Turn relay off then on
  • Turn relay on then off
  • Turn relay on momentarily
  • Turn relay on momentarily multiple times
  • Turn relay on then off multiple times
  • Turn relay off then on multiple times

Amazon Alexa

Wemo Maker doesn’t work with Alexa directly. However, you can make IFTTT’s Applets including Alexa’s triggers and Wemo Maker’s actions. Unlike turning on/off Wemo Switch with Alexa, you will have to say, “Alexa, trigger [a word you specify].” For example, “Alexa, trigger garage door.” will turn on Wemo Maker momentarily, and the garage door opens. Saying it again will close the garage door.

Conclusion

Wemo Maker can control low-voltage devices directly or higher voltage devices by being integrated into a control circuit. It works over your home Wi-Fi network. You can control your electric device with a smartphone or tablet from anywhere. You may use it for your existing device, like garage door opener, sprinkler, gas fireplace, or create a unique device on your own. Wemo Maker is a great item for inventors and tinkerers.

Wemo Smart Plugs Common Issues and Troubleshooting

Wemo Smart Plugs are very useful and good additions to your home automation. While they are easy to use, there are many issues like glitches in Wemo app, losing communications, etc. Here are some common issues and troubleshooting of Wemo Switch, Mini, and Insight Smart Plugs.

My device is Not Detected

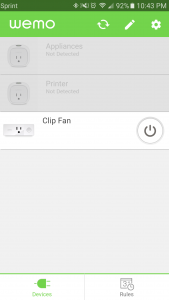
wemo device not detectedIt always happens. Sometimes, one device is not detected. Sometimes, the other or all devices are not detected. I couldn’t find a perfect solution for this.Turning off and then on Wi-Fi of your mobile device might fix sometimes. But, it’s very important to know that the problem is Wemo app only. Though the app is saying “Not Detected,” Wemo is connected to your home Wi-Fi network, and it keeps working on a schedule, timer, etc. You can also use Alexa and IFTTT with no problem. For those who use Wemo app to control devices, I suggest to turn off Wi-Fi on your smartphone. When my smartphone and Wemo app are connected to a cellular network, this problem has never happened. All devices are shown up and available to control.

How to control Wemo smart plugs with 2nd or 3rd mobile device

how to control wemo with multiple mobile devicesLet’s say you have multiple mobile devices. And you want to control Wemo smart plugs with all your mobile devices. The app on the first device works smoothly after you set up. Then you install and open the app on the second or third device. You find it impossible to control them because you can’t get out from a setup mode in the app.

To fix this problem, first make sure that the 1st app is enabled of Remote Access. And then, perform a power cycle. A power cycle of Wemo smart plug is very simple. Unplug the smart plug, wait for 20 seconds and then plug it back in. After that, there is no longer a setup screen. You will see the main screen of the app that you can turn on/off, edit, making rules, etc.

It’s strange that if you installed the app on your devices before a setup, you might not get this problem. So if you have multiple mobile devices and want to use them to control Wemo, you have to install the app first then a setup.

If Wemo keeps performing rules you deleted…

Sometimes, Wemo keeps a schedule, timer or alert even after you deleted them. And you are sure you did it because you don’t see them in the Rules section. If it happens, you will need to clear Rules along with Name and Icon in the following steps

  1. Open the app
  2. Tap “Edit” (a pencil icon)
  3. Choose Wemo device you want to clear Rules
  4. Tap “Reset Options”
  5. Tap “Reset Name, Rules & Date” (iOS) or “Clear Product Info” (Android)
  6. Tap “Yes” or “OK”

After clearing it, change back the name you are using for Alexa, IFTTT, or the other smart home devices. As long as I know, you don’t need to do anything else but changing back the name to continue to make it work with Alexa and IFTTT.

After a power outage, Wemo has issues

After a power outage, your Wemo smart plugs may get erratic in some way. Symptoms vary from situation to situation. Here are some common symptoms and troubleshooting.

If Wemo app can’t find a device…

No matter how many times you restart the app and press a refresh button in the app, it can’t detect your device. If it happens, do a power cycle: Unplug the smart plug, wait for 20 seconds, and then plug it back in.

Applets of IFTTT don’t work

After a power outage, Applet of IFTTT may no longer work although others such as Wemo app or Alexa function without a problem. If it happens, follow these steps

  1. Open IFTTT app and login
  2. Open Wemo app
  3. Tap “More” (iOS) or “Setting (a gear icon)” (Android)
  4. Tap “Connect to IFTTT”
  5. Tap “Connect”
  6. Choose your Wemo device and Done

If it still not works, perform a power cycle and then do the steps above.

Firmware Update related issues

A firmware update is necessary for Wemo products to work properly. Before upgrading a firmware, make sure to update Wemo app to the latest version.

Firmware Update will never finish

You are prompted to upgrade firmware. And you accept and let the app start upgrading, but it won’t finish upgrading. It seems it would take forever to complete a firmware update. Don’t worry. The app just doesn’t change the screen automatically to tell you it’s done. If you are waiting for more than 10 minutes, restart the app, and you will see the word “Upgraded” on the main screen.

After a firmware Update, Wemo doesn’t work

After a firmware update, sometimes Wemo loses connection to your home network. If it happens, the smart plug needs a power cycle. Unplug the smart plug, wait 20 seconds and plug it back.

A Factory Reset

If none of them resolve the problem, perform a factory reset as a last resort. Remember that resetting Wemo smart plugs to default factory setting will erase all data and setup. And you can’t retrieve them. And you may also need to uninstall and re-install the app after the reset. There are two ways to reset Wemo smart plug to default factory setting.

I recommend doing both methods. But resetting through the app first because you can’t do this method after resetting manually on Wemo devices. And resetting manually alone may not be able to erase rules, name, schedules, etc. As a result, sometimes you may see an old name in the app, or Wemo may keep old schedules, etc.

A factory reset through Wemo app

  1. Open the app
  2. Tap “Edit (a pencil icon)”
  3. Choose a Wemo device you want to reset
  4. Tap “Reset Options”
  5. Tap “Erase All Content and Settings”
  6. Tap “Yes” or “OK”

A factory reset manually on the smart plug

  1. Unplug Wemo smart plug
  2. Hold down a reset button
  3. Plug Wemo in while holding down the button
  4. Keep holding down the button for about 5 seconds and release
  5. LED indicator is flashing for 60 to 90 seconds
  6. When you see a LED indicator flash alternately blue and amber (Switch), white and amber (Mini), or green and amber (Insight), it’s done.

Summary

In most cases, a power cycle of Wemo smart plug resolves the issues. Restarting the app and/or Wi-Fi on your mobile devices may work, too. But none of them fix the issues, perform a factory reset as a last resort.

Related Post
Tips and tricks of Wemo Insight smart plug

Belkin Wemo Insight is a smart plug that works in your home automation. It connects to your home Wi-Fi network to switch on/off wirelessly. Using mobile devices such smartphones or iPhones with Wemo app installed, you can turn on/off the plug from anywhere. And It also works with Nest, Amazon Alexa, and IFTTT.

Difference from other Belkin Wemo Smart Plugs

Two other smart plugs are released by Belkin, Wemo Switch and Wemo Mini. Wemo Switch is bigger than Wemo Insight. Wemo Mini is smaller than Wemo Insight. It’s so slim that it doesn’t cover adjacent sockets on the same outlet. So, you can use multiple Wemo Mini plugs on the same outlet. The features of Wemo Switch and Mini are the same. They have the features of switching, scheduling, setting a timer, and being compatible with Amazon Alexa, Nest, and IFTTT. Wemo Insight has all these features plus Energy Monitor.

Energy Monitoring Feature

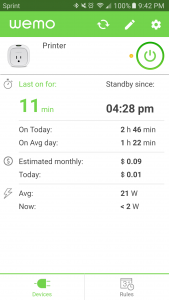
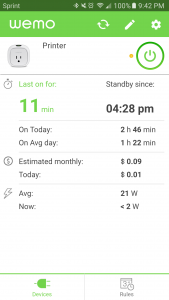
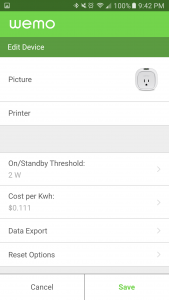
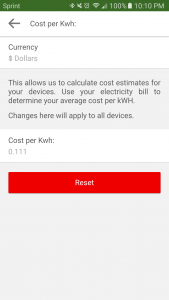
With this feature, you can use the Insight in more ways than you may think. As a basic way, you can see a real-time and average power consumption in the app. And it calculates the today’s or estimate of monthly costs of operating an electric device. You may need to change Currency and Cost per kWh to get accurate values.
Data Export

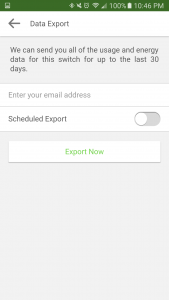
You can have all of the usage and energy data exported to your email address in a CSV format. The app stores up to the last 30 days of data. You can also set up a schedule to send data daily, weekly, or monthly.
Usage Alerts

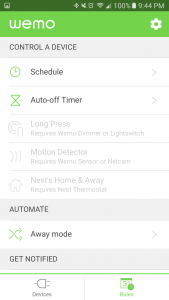
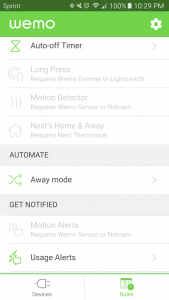
You will get a notification on your mobile device after you set up Usage Alerts. The app notifies you when Wemo Insight detects a device on, off, or on for the time duration you specified. The feature is useful when you use Wemo Insight for devices which automatically turn off or go into sleep/standby mode like a printer, electric kettle, or most battery chargers.

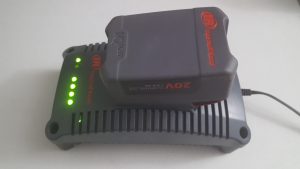
wemo insight energy monitor with battery chargerFor example, this battery charger uses 100W when it just starts charging. As the battery is getting close to full, charging is slowing down, and power consumption is getting lower. Just before the battery gets full, the wattage is as low as 12W. And after it’s fully charged, the charger uses only less than 2W to maintain the battery fully charged. You can take advantage of the difference of these values to get a notification when it fully charges the battery.

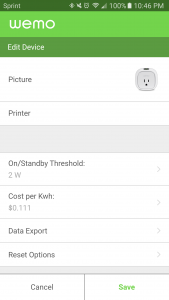
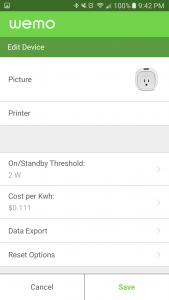
When you use Usage Alert, it’s important to know the wattage when a device is in standby, off, or sleep mode and edit On/Standby Threshold in the app.

Setting a timer

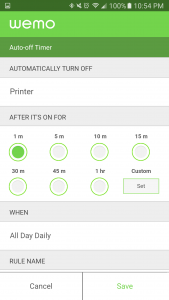
A timer is useful for electric devices like a coffee maker or desk lamp which doesn’t have many functions. For example, this coffee maker has only one toggle switch. You plug the coffee maker into Wemo, set a timer for one hour and you will never wonder or worry if you forget to turn it off after you leave home.

If Wemo Insight doesn’t count down a timer…

Keep in mind that if you use an electric device that consumes very low power, the timer won’t work properly with the default setting. The Insight doesn’t consider a standby or sleep mode as ON. By default, On/Standby Threshold is 8W. For example, this desk lamp consumes only 7W. Though the lamp is on, and you set a timer for 30 minutes, countdown never starts. The Insight thinks it’s in a standby mode because 7W is below the threshold. In this case, you will need to change the threshold to 6W or less to get the timer work properly.

Keep schedule without Wi-Fi network

Schedule is another feature available on all Wemo Smart Plugs. It’s worth noting that Wemo remembers all the setting you made even after a power outage or losing Wi-Fi connection. Once you set up a schedule, the Wemo will keep doing without a Wi-Fi connection. You can make a schedule like turning off a modem and router for an hour and then turn back on at midnight every Sunday.

IFTTT

All Wemo products are compatible with IFTTT. IFTTT is a free web-based service that connects one app to another to interact each other. You make a set of conditional statements called Applets. When a condition is met in one app, it triggers an action in another app. Here is a full list of Triggers and Actions of Wemo Smart Plugs.

Triggers

  • Switched on
  • Switched off

Actions

  • Turn on
  • Turn off
  • Turn off then on
  • Turn on then off
  • Toggle on/off

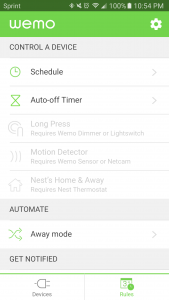
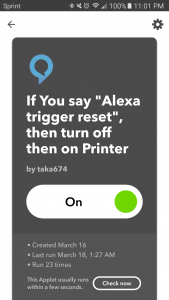
amazon alexa wemo insight iftttI personally use “Turn off then on” for my wireless printer. The printer often loses a wireless connection. It easily recovers by a power cycling. I used to turn off and then on manually. But now, thanks to IFTTT and Amazon Alexa. All I need to do is say, “Alexa, trigger reset.”

Exclusive Triggers to Wemo Insight

Since Wemo Insight has an energy monitoring feature, there are some more Triggers. And you can make unique Applets with them.

  • Standby mode entered
  • Daily minutes on is longer than # minutes
  • Daily cost rises above $#
  • Monthly estimated cost rises above $#

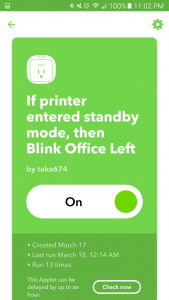
philips hue wemo insight iftttWith them, you can make Apples like, “Get a notification when a daily cost rises above $2.” or “When a standby mode entered, blink Philips Hue light bulb.” Unfortunately, Applets using these Insight-exclusive triggers don’t work immediately. In my experience, they usually delay about five minutes. But they can be delayed by up to an hour as the website says. Applets using non-Insight exclusive triggers and actions work immediately!

Summary

The energy monitoring feature lets you use Wemo Insight in more creative ways. And Wemo Insight is one of the few smart plugs that are compatible with IFTTT. Altogether, the Insight is one of the best smart plugs on the market.

Related Posts:

The Best Smart Plugs compatible with Apple HomeKit and Siri

Smart Plugs are very useful items. It’s easy to install. And most of them don’t require a hub. Instead, they use your home Wi-Fi network. If you have recent iOS devices, some smart plugs can be integrated into Apple HomeKit so you can switch on/off with the Home app or Siri voice command. Here are some popular Smart Plugs compatible with Apple HomeKit. If you have Android devices and Amazon Alexa, please read “How to choose the best Smart Plug for you.”

iDevices Switches ($50)

iDevices Switches use your home Wi-Fi network. You can set up in a free app called iDevices Connected. The app is available at Google Play Store and Apple Appstore. It offers to switch on/off, make a schedule, and an energy monitoring. There is no feature of a countdown timer. As long as your mobile device is connected to the internet, you can turn on/off the Switch with the app from anywhere.

The Switch has a sleek design. A socket is located on one side. The opposite side has a physical button to turn on/off the device. A bar of LED on its face act as a night light, and you can change colors and brightness of the LED in the app. If you use a conventional electric plug, it looks neat on a wall outlet. But if you connect a vertical shape plug or bulky adapter, overall appearance might be ugly.

It works with Apple Homekit. You can turn on/off the Switch by saying, “Hey Siri, turn on/off [name of device].” If you have an Apple TV (3rd gen or later), you can use Apple Home app or Siri voice commands even when you are away from home. The Switch works with Amazon Alexa, too.

iDevices Outdoor Switch ($80)

It’s an outdoor-friendly Wi-Fi smart plug by iDevices. It’s controlled by the same app, iDevices Connected. And, it also has the same features like scheduling, energy monitoring, configuring a nightlight, physical button to turn on/off manually and Siri, Alexa compatible.

The Outdoor Switch consists of a cord and the main unit. The cord is about 8-inch long and attached to one side of the main unit. The main unit has two outlets on the other side. You will need to mount the main unit with screws or hooks on a wall for a maximum rain-tight condition. Though the Outdoor Switch has two outlets, they switch on/off together. You can’t control them individually. According to iDevices, a working temperature range is between -4°F to 122°F/ -20° to 50°C.

iHome iSP5 Smart Plug ($40)

iHome iSP5 use your home Wi-Fi network. You can set up and control with a mobile app called iHome Control available at Google Play Store and Apple Appstore. The app offers scheduling feature but no timer. And iSP5 doesn’t have an energy monitoring feature. What the most impressive about iHome smart plugs is that you can integrate them into various smart home hubs or apps. iHome iSP5 and other two newer models work with Amazon Alexa, Apple HomeKit, Nest, Wink, and Samsung SmartThings. And, not directly, but it’s compatible with IFTTT through Wink or SmartThings.

The plug is very slim. Multiple plugs fit on the same outlet or power strip. At the corner of the plug, there is a small button to turn it on/off manually.

iHome iSP6 Smart Plug ($50)

iSP6 is a newer version of iSP5. It’s similar, slim but wider than iSP5. What the differences are that a physical on/off button and LED indicators are located on one side of the plug. All features are the same as iSP5’s, except that it’s compatible with iSPR4 Remote Control (sold separately.)

iHome iSP8 Smart Plug ($50)

iSP8 is the latest version iHome smart plug. It comes with an RF remote which works from up to 35 feet away, no line-of-sight required. The remote can be programmed to control a single or multiple smart plugs simultaneously. A design of iSP8 is the same as iSP6. One thing different from iSP6 is that iSP8 has an energy monitoring feature.

iHome iSPR4 Remote Control for iSP6 and iSP8 ($20)

iSPR4 is an RF remote for iSP6 and iSP8 smart plugs. While the remote included in an iSP8 package has only one on/off button, iSPR4 has four. Each button can be programmed to control a single or multiple smart plugs simultaneously. It uses CR2032 battery (included.)

Elgato Eve Energy ($50)

Elgato Eve Energy is a smart plug using Bluetooth instead of Wi-Fi. You can set up in Eve app available at Apple Appstore. It offers scheduling and energy monitoring features, but no timer. It works with Apple HomeKit and Siri. The Eve Energy has a physical button to turn on/off manually. A 2.6″ square is too big to put multiple plugs in the same outlet. In general, a range of Bluetooth is narrower than Wi-Fi. But, The Eve Energy uses the latest version of Bluetooth, and range-related issues are not reported. However, when you are away from home, you can’t control it even with Eve app unless you have Apple TV 4th or iPad with iOS10 that’s always home and enabled as your home hub.

Elgato Eve products work exclusively on iOS devices. There is no app for Android devices, and it’s not compatible with Amazon Alexa.

Koogeek Smart Plug ($35)

Koogeek Smart Plug uses Wi-Fi. Its size is almost the same as Elgato Eve Energy. And, because of the size, most likely, you can’t use multiple plugs in the same outlet. A physical on/off button is located on the top of the plug. You can set up and control the plug in Koogeek Home app. The app offers scheduling, energy monitoring, and most importantly, timer. Though timer is a very useful feature, none of the other smart plugs here don’t have this feature. Koogeek Smart Plug works with Apple Homekit and Siri.

Koogeek Smart Home products work exclusively on iOS devices. There is no app for Android devices, and it’s not compatible with Amazon Alexa.

Conclusion

iHome Smart plugs are the most versatile of all. The app is available on both Android and iOS devices. And, They work with Alexa, Siri, Nest, Wink, SmartThings, and indirectly IFTTT. There are three choices. iSP5 is the smallest without an energy monitoring feature. iSP6 and iSP8 is a little wider than iSP5. In addition to a voice command from Alexa and Siri, or using compatible apps, you can control them by a physical RF remote, but the only iSP8 includes a remote. And only iSP8 has the feature of energy monitoring. Elgato Eve Energy and Koogeek are compatible with iOS devices only. Elgato uses Bluetooth instead of Wi-Fi. Koogeek is the only smart plugs here which can set a timer. For outdoor use, iDevices Outdoor Switch is the one to consider.